Generally, we manage WordPress theme via WordPress dashboard by moving to Appearance > Themes. It is actually very simple to upload or change WordPress theme through the dashboard. When you make any changes or updates to a theme, at some unavoidable it may not work.
There could be a reason that the theme is not comfortable with the changes and finally it displays a blank screen. In that case, when you are not able to access the dashboard, the safe method to rescue your website is from restoring the backup.
Another method is you can troubleshoot the error. In order to troubleshoot it, you can switch them in order to backup your existing theme through FTP. Then you have to remove all the theme folders from /wp-content/themes/ expect the default theme.
Now the WordPress will automatically get back to you the default theme. You can try these both methods to get access to your WordPress dashboard and you can change the theme.
By chance, if you don’t have any backup, or you don’t wish to use the default theme, then you can change the WordPress theme via phpMyAdmin.
Steps to change WordPress theme via phpMyAdmin:
Changing WordPress theme via phpMyAdmin is not at all a very big task. It’s very simple and you can accomplish it in just a few minutes.
- First, connect your WordPress website to FTP client (Download FileZilla Client Software here).
- Now move on to /wp-content/themes/ folder. By entering this, you can see the currently available themes that you are using on your website
- Once you found that the theme is installed, now move on to the cPanel dashboard (Go to yoursite.com/cpanel) of your WordPress hosting account
- Then you have to scroll down to the databases section and then click on to phpMyAdmin.

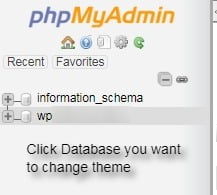
- Once you enter into phpMyAdmin, there you will find a lot of database names on the left side of the screen, click on to the database which you are using for your WordPress website.

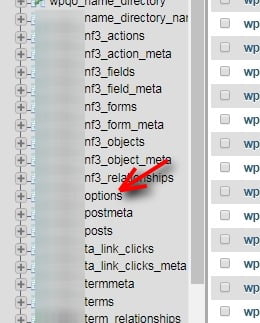
- Next, by clicking the particular database, it lists a number of tables present inside the database.
- There you have to click ‘wp_options’ table to open it

- Then you have to scroll down to locate ‘template’ and ‘stylesheet’ rows (This two rows located in the second page). In order to do that, click on the edit button next to the template row

- Now the row editor will open. There you can change the value for option_value field to the theme that you wish to use on the WordPress website. It is like same as the folder name in /wp-content/themes/ folder.Then click on ‘Go’ button to save your changes

- Repeat the process same for the stylesheet row just like templates.
- Once done with the changes, save the changes.
If you want to see the changes in action, then visit your website. You will be able to find the changes you made to the theme of your website.
Conclusion:
As mentioned above, these steps are very easy to make changes to WordPress theme via phpMyAdmin. You need not require any technical stuff to work on it. We hope you liked this article. If you have any queries please feel free to comment us. Your comments are most awaited. You can subscribe to us on Facebook and Twitter

