You will need to know how to translate your WooCommerce shop into multiple languages. A great way to expand your e-commerce business is to create multilingual shops. If you want to sell your products or services to people across the globe, then translation is very important. In this article, we will walk you through all the steps you need to follow to do this.
Why translate a WooCommerce store?
There are many reasons why you may want to translate a WooCommerce store.
- Translating WooCommerce stores will help you attract more customers and increase sales.
- It will also help you improve the user experience of your customers and build trust between your customers and your brand.
- If your main business is based in a language other than English, you will probably find it easier to target your customer base in the language they speak and understand. For example, if you are from Australia and your main customer base is in the UK, translating your website will allow your customers to buy products in their native language.
- To increase your business in other countries.
- To save money on shipping.
- To reduce customer support costs.
- To increase website traffic.
In WordPress, it is easy to translate your WooCommerce store by using plugins. There are many multilingual plugins available in the market to translate your store. Among them, TranslatePress and WMPL are the best. In this post let’s see how to set up these plugins and translate your WooCommerce store.
TranslatePress
TranslatesPress is a WordPress plugin that lets you translate your content into any language. It has a nice and simple user interface, allowing you to select the language you want to translate to or from. You can translate a block of text (like paragraphs) or entire pages.
It’s perfect for websites and blog posts that have content in English and another language like Spanish, German, French, Italian, etc. This plugin can help you translate and change the text in WordPress with ease. You can do all kinds of things in the translation process. Change the language and content of posts, pages, or other posts on your site.
Features of the plugin:
- Translate content into any language with the click of a button.
- Fully responsive so it looks good on all devices.
- The ability to translate each article separately.
- The ability to translate articles into multiple languages.
- A translation queue so you can manage the translations easily.
- An interface for the WordPress dashboard.The ability to set article categories, and tag posts with custom taxonomies.
Setting up the TranslatePress plugin
Install and activate the TranslatePress plugin directly from your admin panel.
Note: Before translating your WooCommerce products, you have to choose another language in which you want your products to be available.
Once the plugin is activated, navigate to Settings>> TranslatePress. In the TranslatePress settings page, click the General Tab, check your default language, and from the drop-down box select the languages you want for your store.
Note: You can add as many languages as you wish by clicking the Add button.
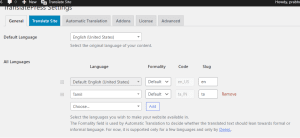
You can customize other settings as well like how to display the language selector. There are many options to choose from. Once done click the Save Changes button.
Once the general settings are done, now click on the TranslateSite tab to launch the translate editor.
![]()
In the translate editor, on the right side, you will be able to see a live preview, and on the left side is the translation panel.
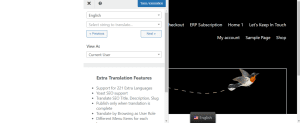
In the preview panel, you can click on any links to move to different pages. You can click on any texts in the preview panel that you want to translate and click the blue pencil icon to edit them.

In the left panel, you can type the translations for the text. You can translate for any text and any website.
Once done click the Save Translation button to save your changes.

That’s it, now you can view your website to see the translated product. You can just click the language switcher and change the desired language.

You can similarly, change the language for any of your websites, products, etc.
WPML
The WPML (WordPress Multi-Language) plugin lets you translate posts or pages from one language into another language. You can also use it to localize your theme so that it displays posts and pages in the language you want them to be displayed. This lets people in different countries read your posts.
It allows you to create different languages for our website, just by choosing one of the available language packs from the WPML settings page. It’s an extremely powerful yet very easy-to-use plugin for all WordPress users! Using this plugin, it’s possible to add, translate, and delete languages on your site with just one click! In addition, WPML provides the ability to translate text between multiple languages without changing your site’s code.
Features of the plugin:
- To make it easy to create websites with different languages
- Help translators translate your site with as little effort as possible
- Help developers work with internationalization, localization, and translation
- The plugin also includes an option to use Google Translate for translating content.
- It automatically detects the language of a user’s browser and redirects the page to the appropriate language page.
- It offers an admin panel where you can add new languages and manage existing languages.
- It also provides an option to enable or disable a specific language.
- It provides a way to convert existing content into different languages.
Setting up WPML Plugin
Install and activate the WPML plugin right from your admin panel. Once the plugin is activated, you will find the Register Link. Here you will have to enter your website key.

Then navigate to Plugins>>AddNew>>Commerical page
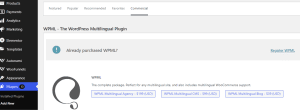
Here you have to choose one of the WPML premium plans: WPML Multilingual Agency, WPML Multilingual CMS, and WPML Multilingual Blog.

Then you have to download the following plugins from your WPML account
- String Translation
- Media Translation
- Translation Management
- WooCommerce Multilingual
Navigate to your WordPress dashboard, and install the above plugins. Once the plugins are installed and activated you will get an ‘Operation Complete’ message.
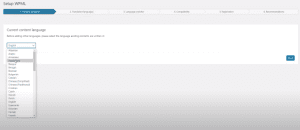
Now navigate to WPML>>Languages in your admin panel. This will lead you to the setup page.
Initially, you have to set the current content language for your website and then click the ‘Next’ button.
Then you have to select the languages for translation. You can choose as many languages as you wish.

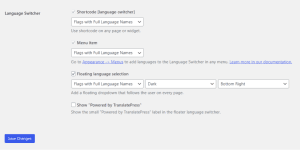
Now the selected language options will be available on your language switcher. In the language switcher, you have to choose the order for your languages. And also you have to choose what to do if the translation is missing for any product or page.
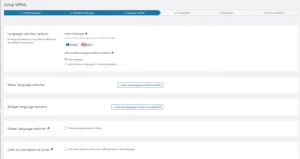
Then you can add a language switcher to the navigation menu, to a widget, or to a footer area of your website.
You have an option to link to a translation of posts. You can show links above or bottom of your content. Once done click the Next button.
![]()
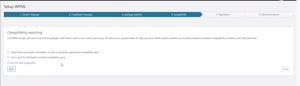
Then the next process is that WPML will ask you whether you want to send the list of active plugins and themes information to WPML.org. If yes click the check box and click the Next button.
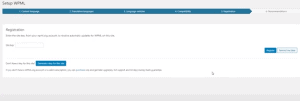
Then the next step is the registration process. If you have already entered the website key, then just click the Next button.
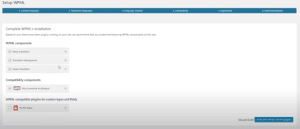
Here in this step, you will have options to install other components for WPML. If you have already installed and activated just click the Skip and Finish link. If not you can install and activate it here.
Once done you will be able to see the WPML setup wizard. If you select Translate Everything during the setup process, WMPL will automatically translate everything including pages, taxonomies, and product descriptions. If you want to manually translate then navigate to WooCommerce>>WooCommerce Multilingual page. Here you will find the Product tab with the list of store items.
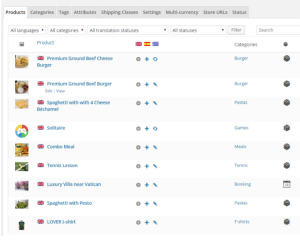
Here you can see the supporting languages next to each product. You can click the pencil icon to edit the translations and also you can click the ‘+’ icon to add further translations.
Similarly, you check and edit the translations for further tabs such as Categories, Tags, Attributes, Shipping Classes, Settings, Multi-currency, Store URLs, and Status.
That’s it, you have successfully translated your WooCommerce Store.
Conclusion
To succeed in this industry, you need to be able to make it easy for people to understand your products. One way to do this is by translating your descriptions into more than one language. If you have a lot of products and want to translate them all at once, there is a quick and easy solution. You can perform them by choosing the right plugin. Hope you got an idea about how to translate a WooCommerce Store. If you have any queries or suggestions please feel free to comment.