If you have an eCommerce website or you need to connect with your customer then linking Microsoft Outlook with your website through WordPress will be the best option. Connecting Microsoft Outlook will help in improving your email deliverability and it makes sure that your email reaches your subscriber quickly. In addition, you can send lots of mail, no other application will give you this.
This article will guide you in connecting Microsoft Outlook with your WordPress. Not only that this article also provides information about the advantages and rolls of SMTP in sending mails.
The following are the complete steps for connecting Microsoft Outlook with WordPress.
- Step 1: Install and Activate the WP Mail SMTP plugin
- Step 2: Start with WP Mail SMTP
- Step 3: Configuring a Microsoft Azure Account
- Step 4: Saving and Authorizing WP Mail SMTP
- Step 5: Sending a Test mail.
Advantages in using Microsoft Outlook to send WordPress Emails
Microsoft company provides many valuable services for their customers in addition to that WordPress users can also afford their mail services through Outlook mailer. The Outlook Mailer helps in improving the deliverability of your emails and this is enabled by using an API, where you don’t need to enter sensitive information into your WordPress admin area. The main advantage is that Outlook allows you to send a lot of emails at once. Nearly you can send 10,000 emails within a minute. Another advantage is that WordPress doesn’t need to access the php mail function to send mails.
In another aspect, many WordPress hosting services don’t have PHP mail properly configured. So, configuring Microsoft Outlook with WordPress will be the best choice in sending emails to your customers. Also, if you send mail using WordPress hosting service to your customer, then the Gmail service provider can’t detect the mail comes from and it will place the mail in spam. The reason is that WordPress hosting service does not have proper configurations.
Connect Microsoft Outlook with WordPress
The following steps will guide you in connecting your WordPress with Microsoft Outlook to send your emails.
Step 1: Install and Activate the WP Mail SMTP plugin
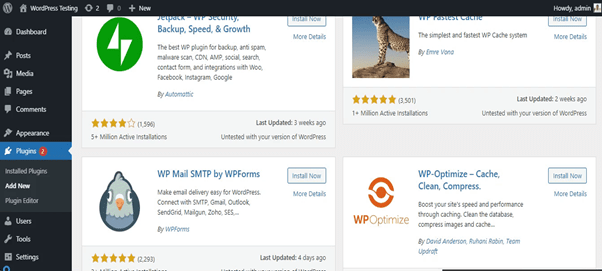
To install and activate, just go to the ‘Add Plugins’ page and search for ‘WP Mail SMTP’. Find the plugin, install and activate the plugin to do the next step.
Step 2: Start with WP Mail SMTP
First, go to the settings area of the plugin. Initially give your email id and the name that is sent from. Then choose your SMTP mailer through which you would like to send your mail. Here selects the ‘Microsoft Outlook’ option in the ‘Recommended Mailers’ list.
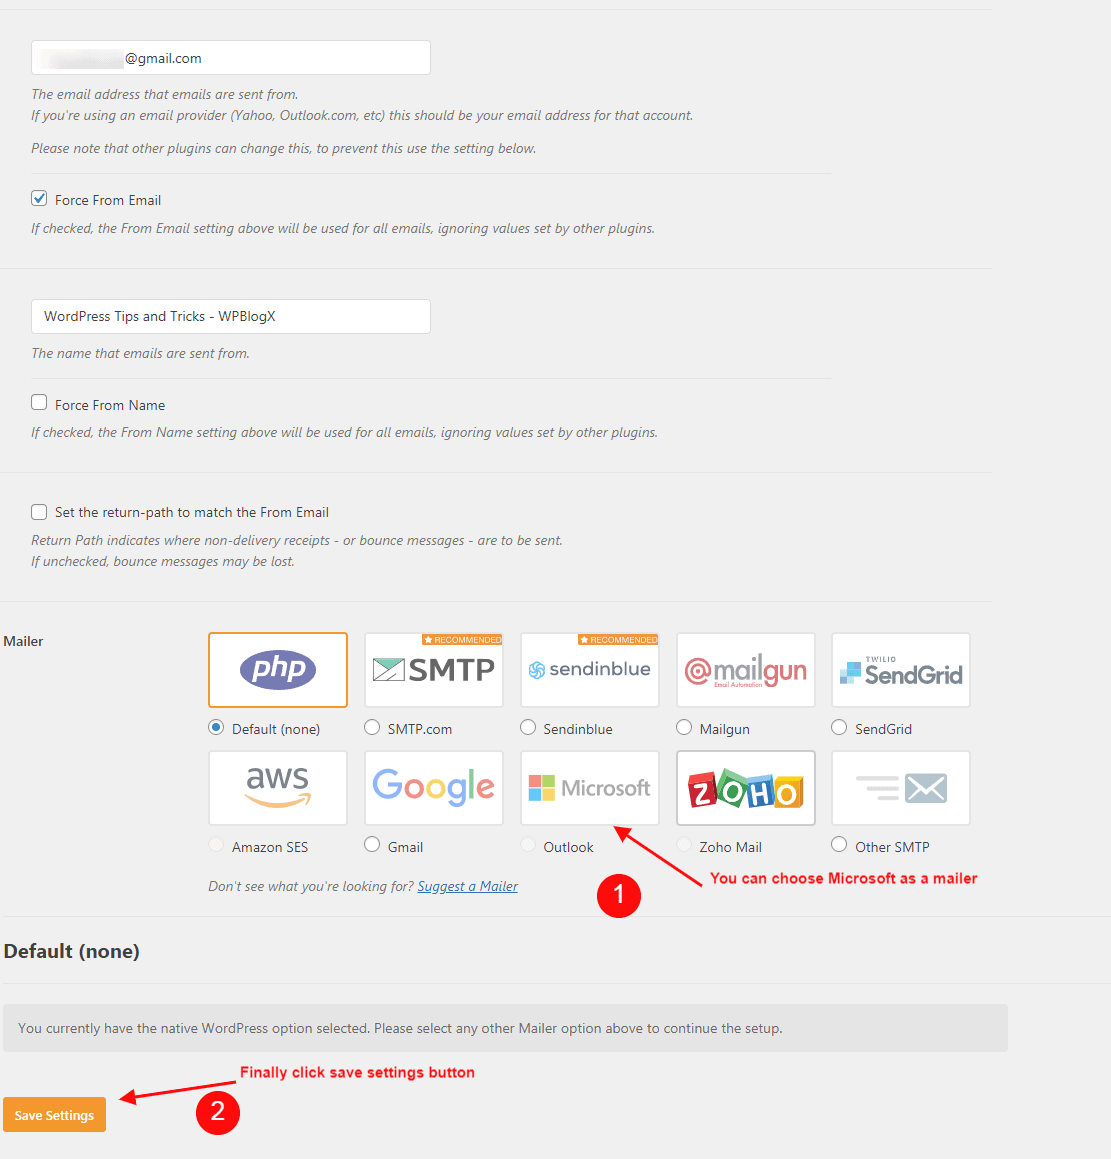
In which you can select the optional ‘Return Path’ check box, this indicates where non-delivery receipts are to be sent. If you unchecked, the non-delivery message will be lost.
Once, you have selected ‘Outlook’ as your mailer, the below section will get appears.
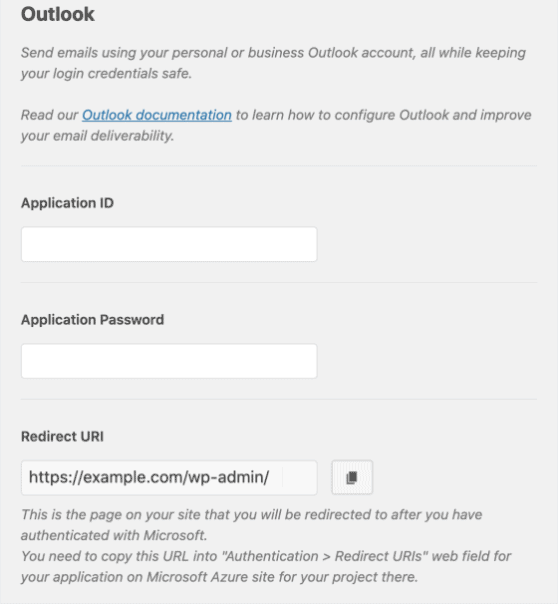
To fill the information in the section, appear you need to configure the Microsoft Azure account. This process does not require any coding and the next step will show you the exact.
Step 3: Configuring a Microsoft Azure Account
In order to do this step, you should have a Microsoft Azure account else any one of the Microsoft email accounts like Live, Hotmail, office 365, etc. You can log into Microsoft Azure with your existing account credentials.
If you don’t have the account in the above Microsoft account then you can directly go to the Microsoft Azure account to sign up. Now, open the Azure portal to get your Application ID, password and redirect URI.
Create an Application ID
Just type ‘App registration’ in the search bar in the Microsoft Azure application.
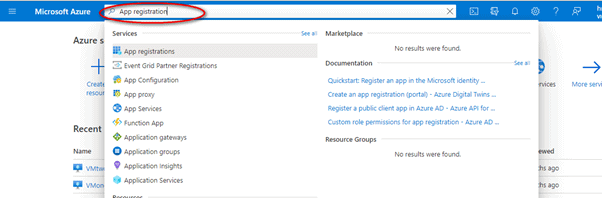
Then select the ‘App registration’ option from the search list.

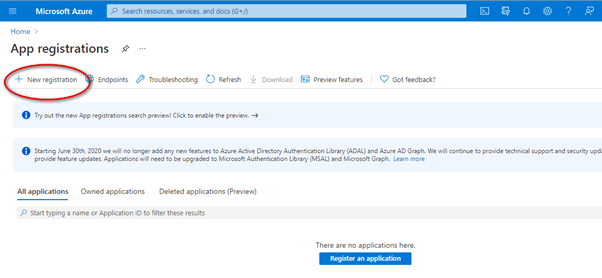
From the new registration window, select option ‘+ New registration’.
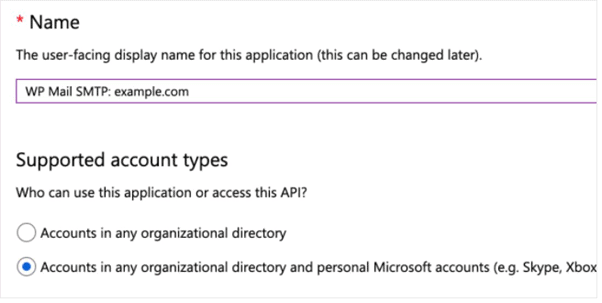
Now, you will get a new registration screen and fill out the following options on the screen.
- Name: Give a name that will be displayed for the end-user. I recommend you to keep the following ‘WP Mail SMTP: yourdomain.com’.
- Select ‘Accounts in any organizational directory and personal Microsoft accounts’ for the supported Account type.
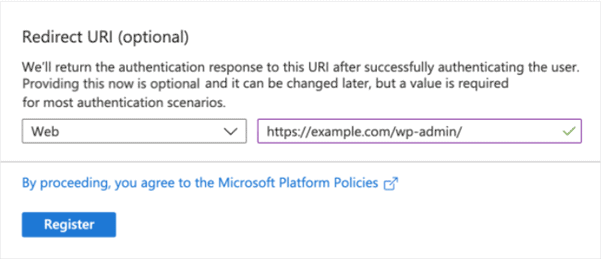
The next screen will be registering the redirect URI. The URI will be in the last screen of the WordPress configuration for connecting the Outlook. Just copy and paste it into the ‘Redirect URI’ Screen.
As soon as the registration gets completed, you will get ‘Application ID and Object ID. Now copy the ‘Application ID’ and paste it into the WordPress screen. Now remaining is the Application password, to create that, go to the Azure application and click on ‘Certificates & Secrets’.
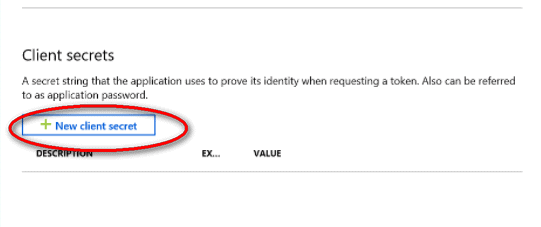
Now select the ‘+ New client secret’ button to create a password.
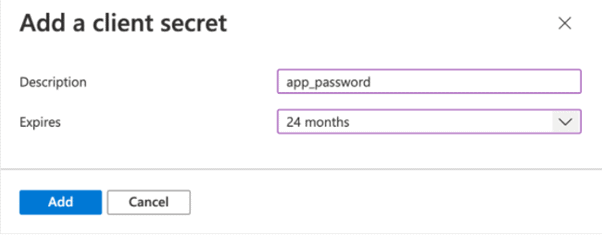
Give a description of the client secret you creating and expiration time.

Once you have completed the previous screen, you will get the password under the value section. Now, go back to your WP Mail SMTP settings. Copy the password generated in the client secret screen.
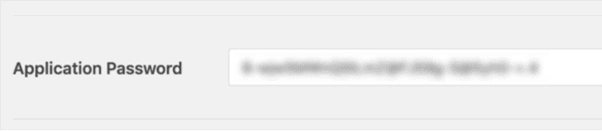
Paste your password in the WP Mail SMTP screen.
Setup API permissions
Up to now, you have filled both the application ID and password. The next step will be your API permission, to get that go to the Azure application. To get started, you will need to click on API permission in the menu on left.
Click the ‘+ Add a permission’ option.
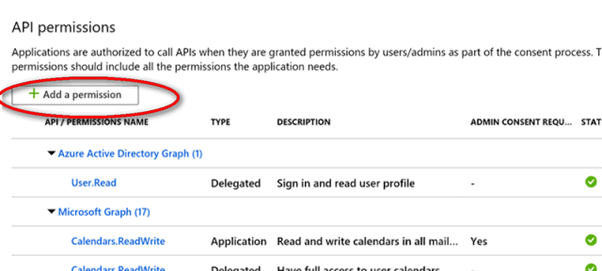
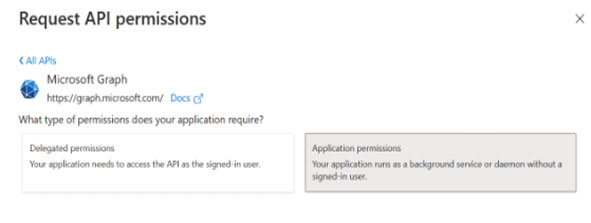
A page gets opened with the title ‘Request API Permission’. Here select the option ‘Microsoft Graph’.

On this page, you need to fill out two information that follows,
- What type of permission does your API require: choose ‘Delegated Permission’.
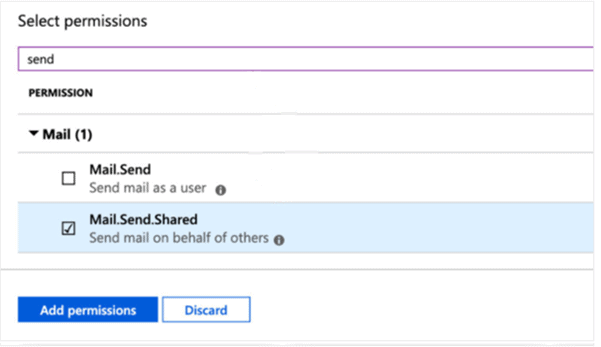
- Select permissions: Type ‘Send’ and select the ‘Mail.Send.Shared’ option below under permission.
Finally, select the ‘Add permission’ button.
Again repeat the same process ‘Request API Permission’, now select ‘ Application Permissions’.
Now, again search the term ‘Send’ and select the term ‘Mail Send’.
Step 4: Saving and Authorizing WP Mail SMTP
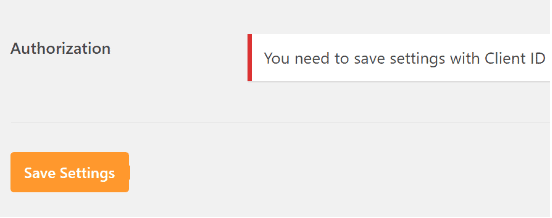
After setting up the API permissions, now you go back to the WP Mail SMTP settings and then click on the ‘Save Settings’ button.
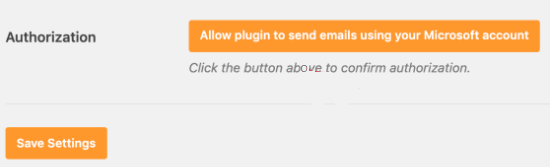
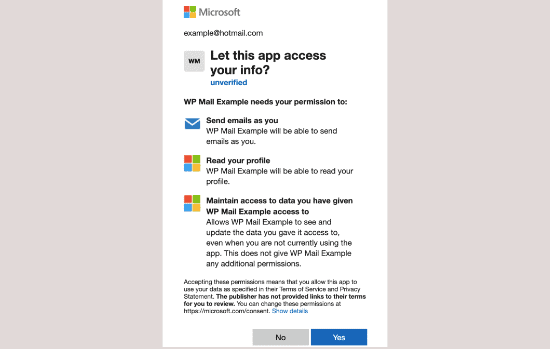
Finally, confirm the authorization by selecting the button ‘Allow Plugin to send emails using your Microsoft account’.
Once you completed the authorization, you will be redirected to the Microsoft Permission form. There select the ‘Yes’ button. This will allow you to connect with your Microsoft account.
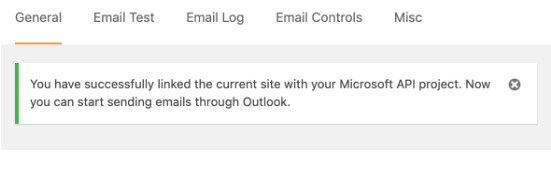
Now you will get the settings page, which shows that you are ready to send emails through outlook.
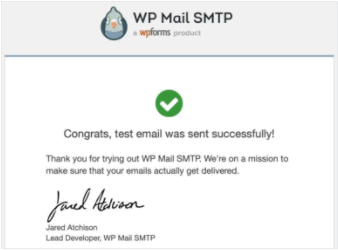
Step 5: Sending a Test Email
In the settings window, move to ‘Email Test’. Enter the mail id and click ‘Send Email’.

Now you will get the mail in the below form.
Summary
I hope, this article will help you in connecting your Microsoft Outlook with WordPress. Connecting your Microsoft outlook will help you in improvising your customer management and connecting you with your customers through emails. Enabling you to connect with many customers through mail and to solve their queries frequently.