Like WordPress, most applications haven’t had many changes in their parts, but it still suits the current needs. While other platforms like Medium providing real-time experiences for writers. The WordPress platforms have also introduced a new editor called Gutenberg, which holds a name called block editor.
The name ‘Gutenberg’ is named after Johannes Gutenberg, who invented the moving printing press 500 years. This editor has been released to reduce the difficulties in using HTML codes to conclude the design. Still, most visual editors make the designers apply shortcuts and HTML codes while designing, while Gutenberg removes that. The focus of Gutenberg is to express entire works into many blocks and apply the layouts directly into the editor. With this Gutenberg, you can create a new website without knowing HTML or CSS languages using WordPress. The entire design will be separately identified as blocks and have more advanced layout options.
Gutenberg WordPress editor should be installed into the WordPress editor as a plugin in version 4.8, but in version 5.0, Gutenberg is added as the default editor. Thus, version 5.0 also has its own classic editor. The below shows the difference between the classic editor and block editor (aka Gutenberg).
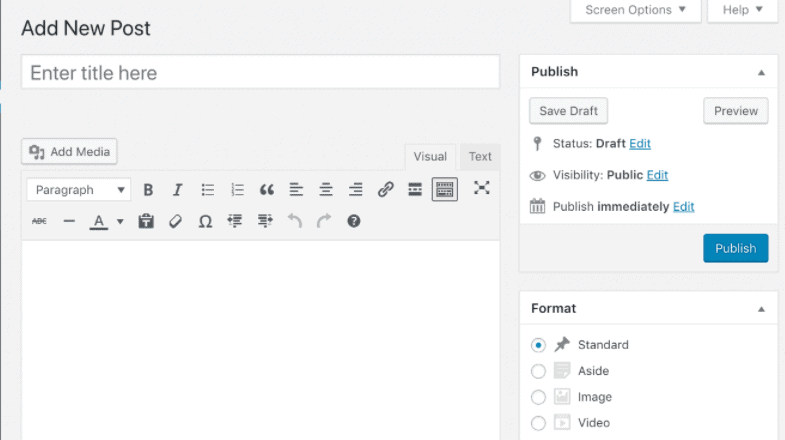
Fig 1: Classical Editor
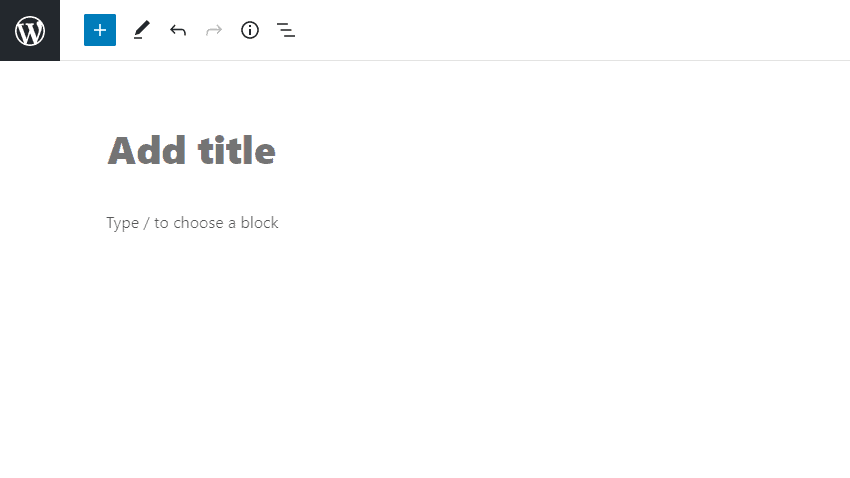
Fig 2: Block Editor
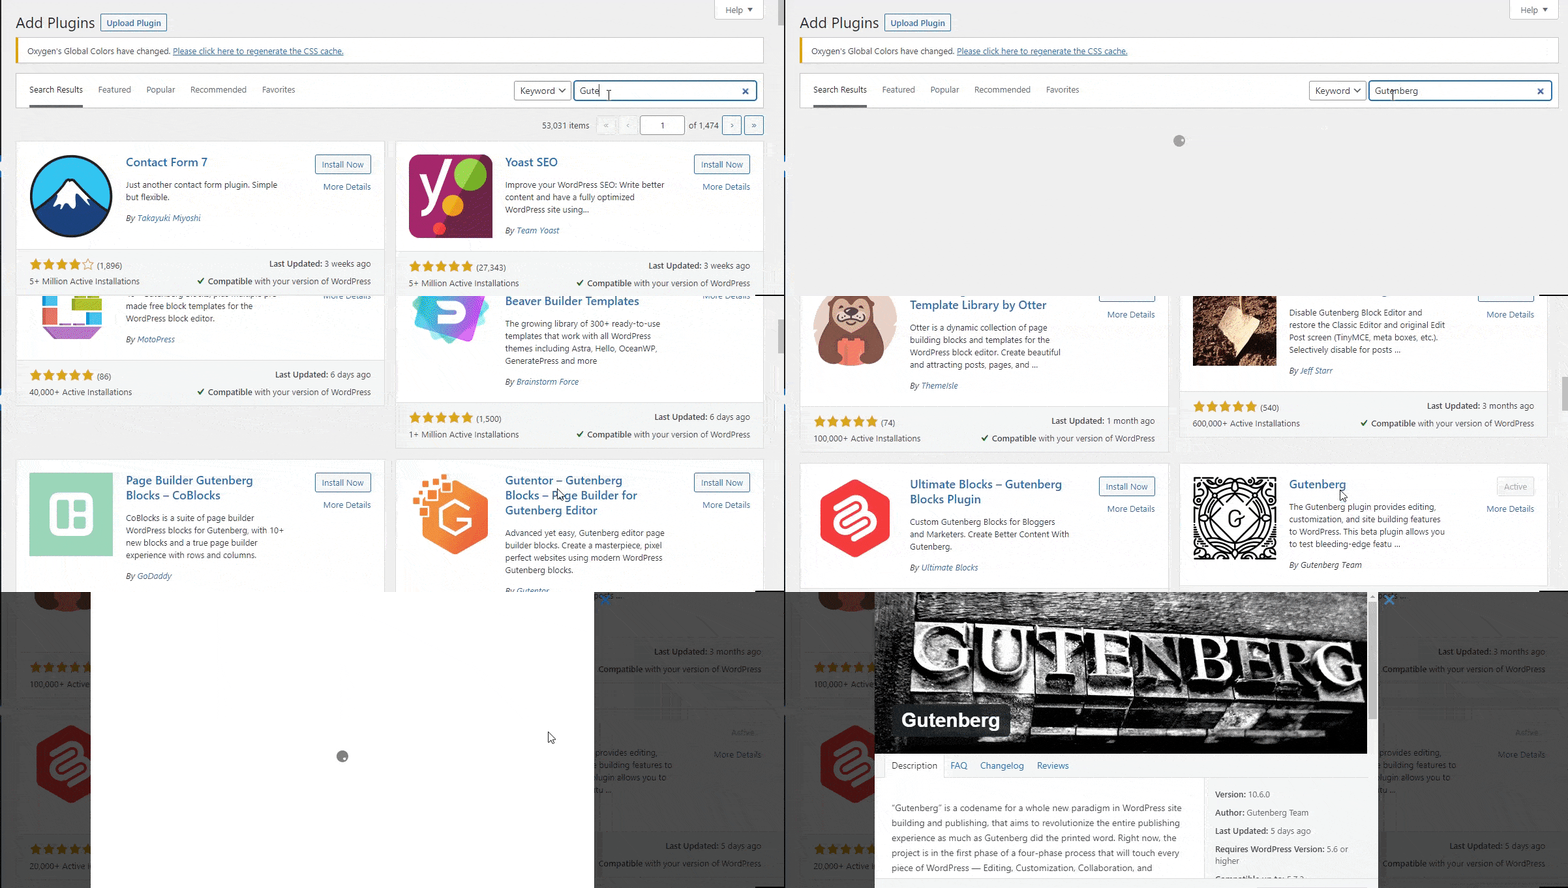
Gutenberg Manual
Adding Blocks
First, we dive into creating a new block which will be the basics and initial step for all the process. To start creating a new block, just follow the below step.
Step 1: Click on ‘+’ sign in the initial page of the Gutenberg editor, where you see the default image and welcome message.
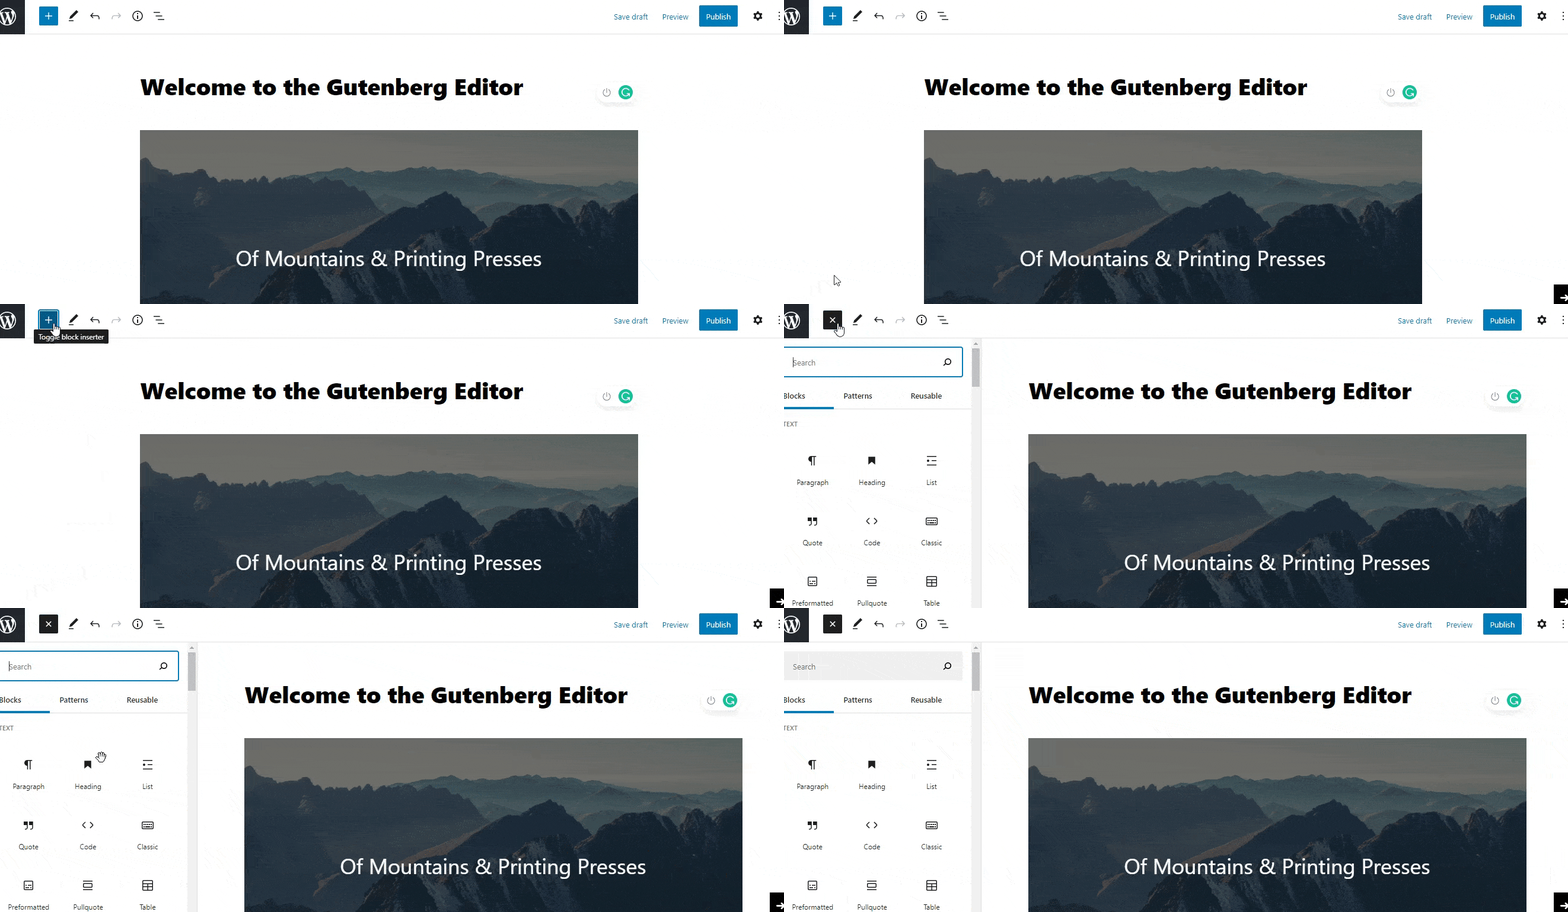
Step 2: Once the new block has been created, you will find many readily available blocks under the search field. There are many blocks available like Paragraphs, Images, Headings, galleries, Buttons, etc.
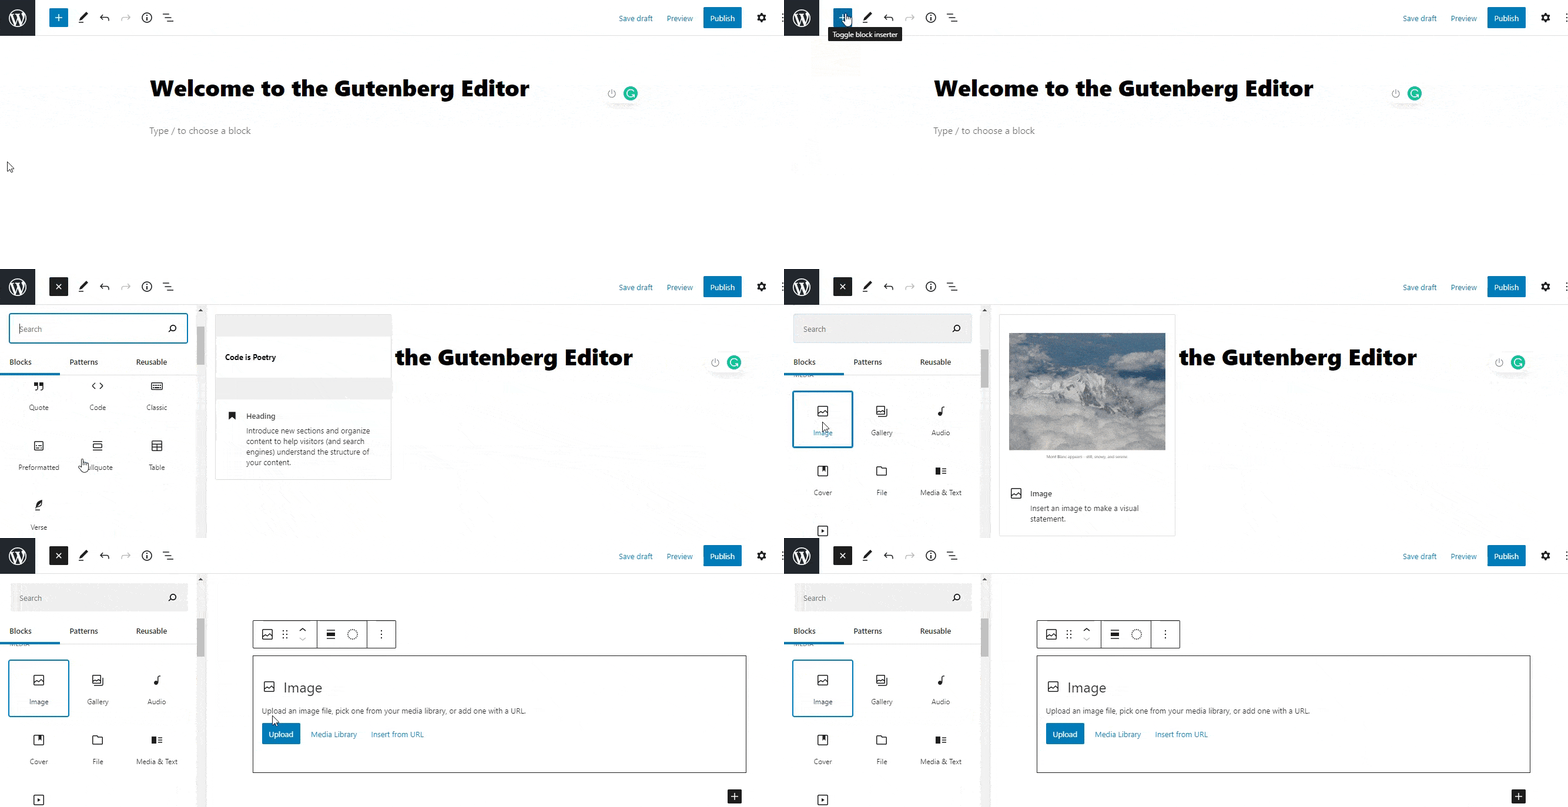
For example, the image can be added by using the options given above. Also, the image can be reusable from the Gutenberg repository. This will be discussed shortly.
Rearrange your blocks
The blocks can be rearranged by using the down and up arrow in this Gutenberg. This looks very easy in altering the blocks between other blocks.
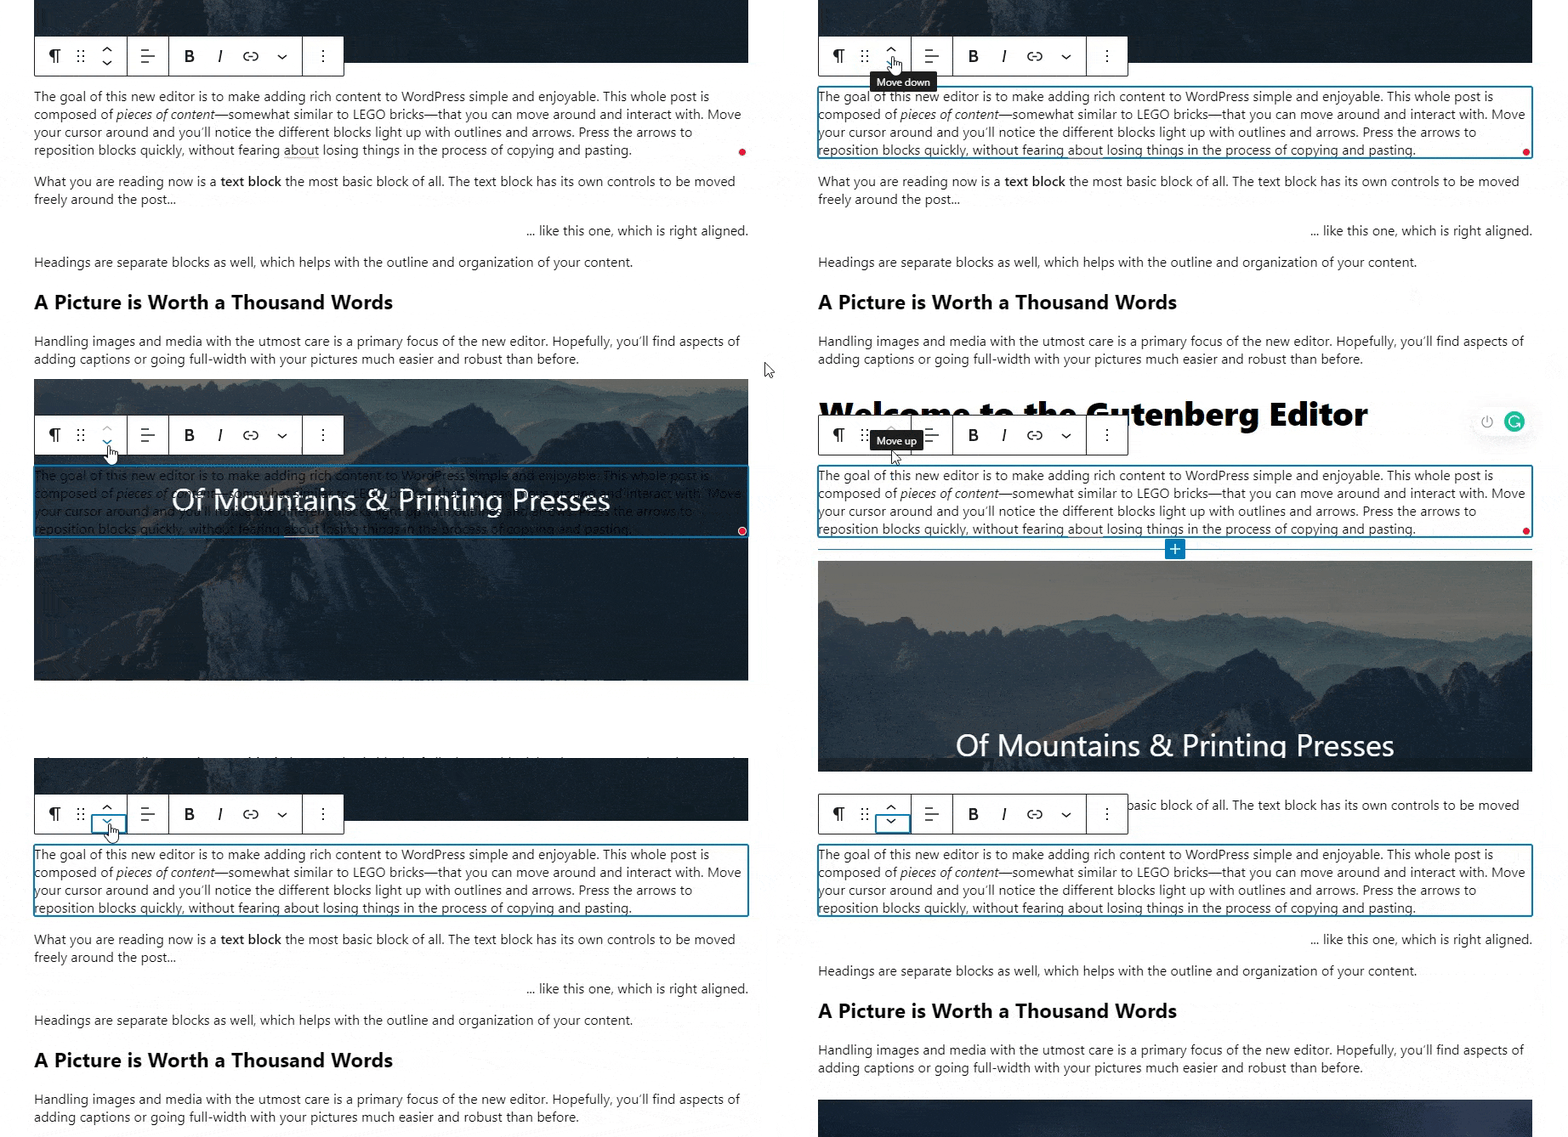
When you select the block of anything like text or image, the popup box appears. The arrow marks available will help you in moving the particular selected to up or down.
Adjust your block styles
Text
The block styles can be adjusted, which can be possible by using the various options available in default. Each block has its own different styles. So, Gutenberg displays appropriate styles for particular blocks. The below image shows an adjusting block style for text.
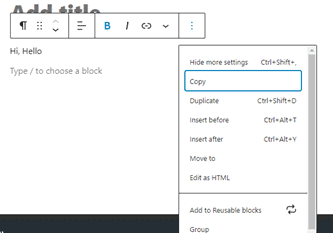
It’s pretty easier in choosing your style because it gets notified automatically with the right icons. Also, you can get additional options by selecting three dots.
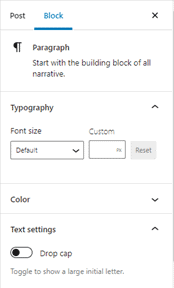
The settings button found in the top right corner will give you the additional settings to change the font style, colour, and advanced settings like HTML anchor and CSS classes. Everything will be shown in the below sections.
Text Block Properties
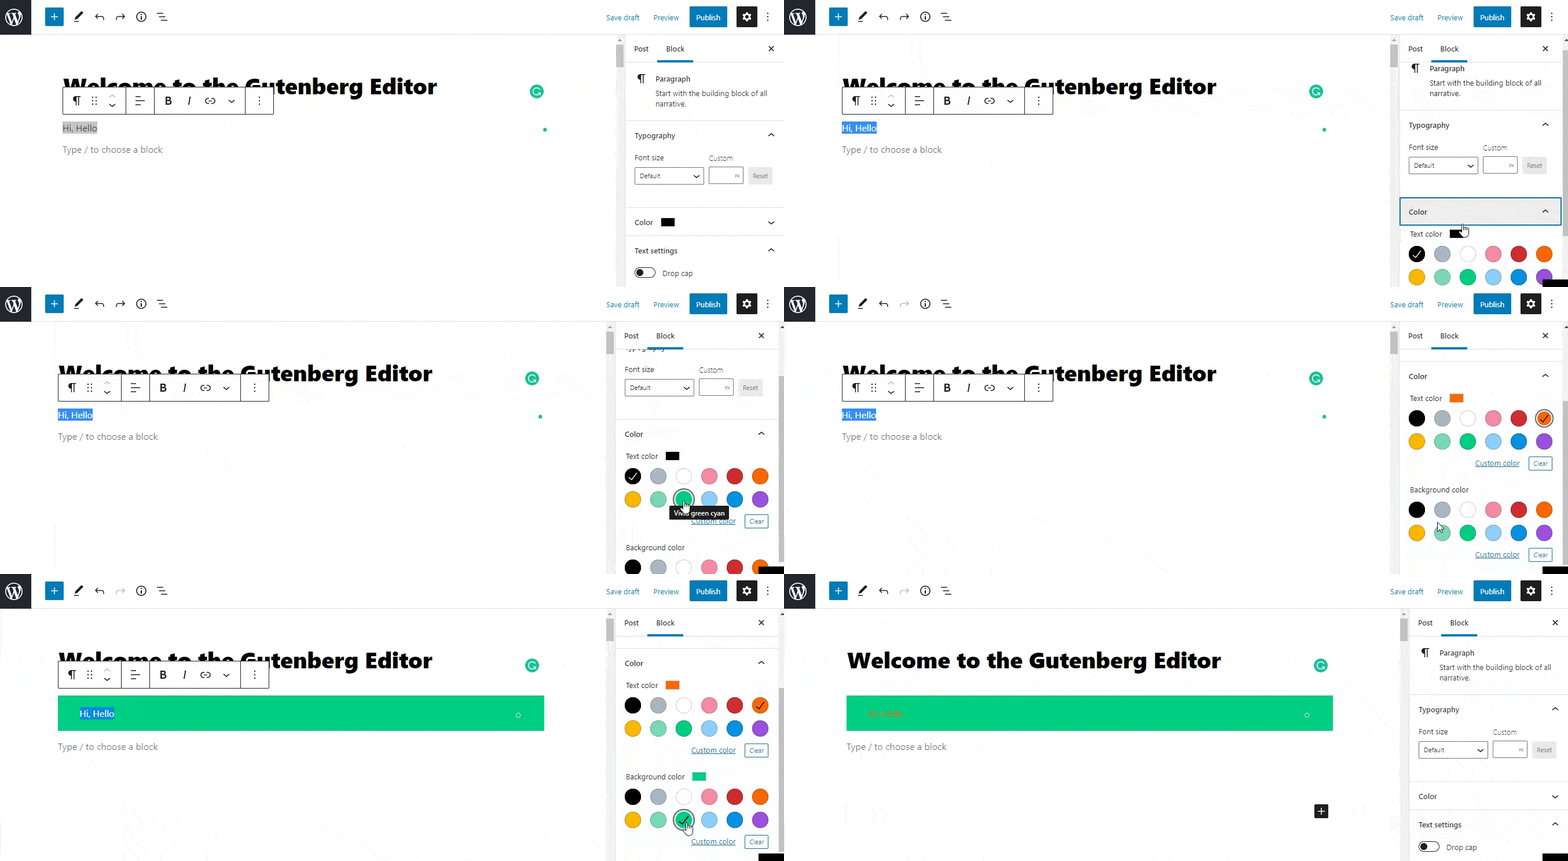
Colour
There are various colour options available, and applying these are very easy because you not need to find the colour code. Allows you to choose various colours within some seconds.
Transform
Now any of your content can be transformed into various types in a second. Gutenberg gives you valuable things to do within a fraction of a minute.
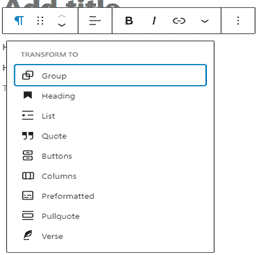
Particular sentences or paragraphs can be modified into many formats like heading, list, quote, etc. So, you need not worry about applying changes in the content at any time.
Buttons
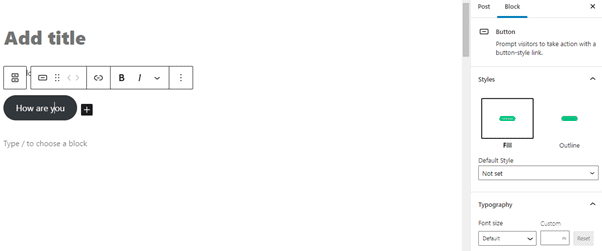
Guttenberg gives us an easy way to create a button because you can easily transform any words or sentences into a button. Also, the button holds many properties, which are the available right side of the screen.
Images
Comparing with text blocks, the image block will have its own styles. The following image will describe to you that,

The first option is to change the image type or style you want. Through this, you can transform the image into the gallery, columns, cover, etc. Also, the image style can be modified to rounded from default. Refer to Fig 14 below.
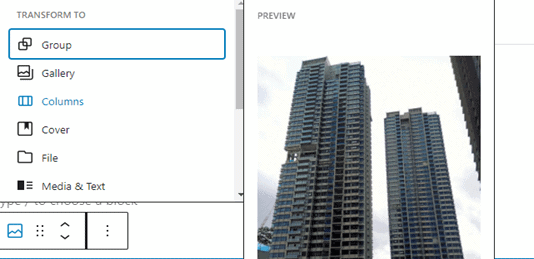
Still, you can find many settings in the row to crop, link, align, filter, and replace the image.

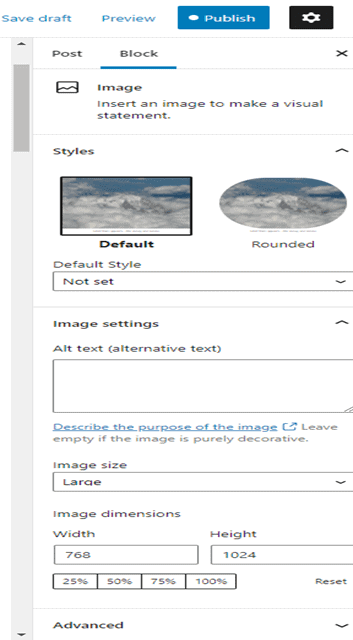
The above options are available under the settings option. To get this, just select the ‘Settings’ icon on the right top corner of the screen.
Image Block properties
Like text block, the image block has its own properties, which will be more useful in modifying the appearance of the images better.
Duotone
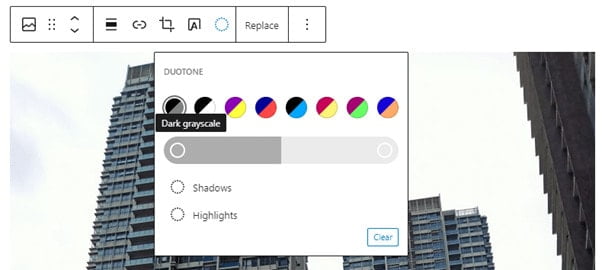
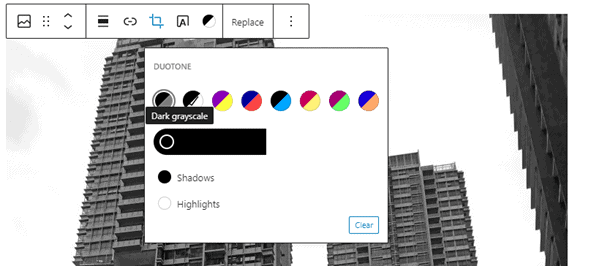
The duotone will be your option in some situations to change the entire image into a different form. There are a variety of options available for the image.
Example:
Text over image
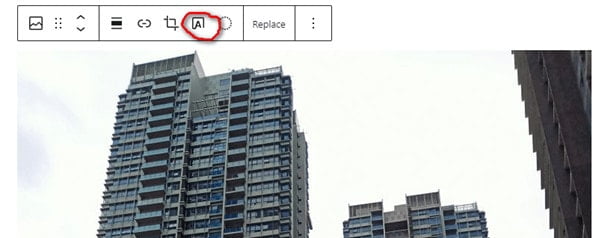
Adding watermark or copyright information would be more useful by using the ‘Text over image’ option. The below screen describes you with an example.

Embed Option
Gutenberg makes embedding things very easy. You can embed any social media like Twitter, Instagram, Flickr, YouTube, etc. You can embed using the valid URL.

Word and Block Counts
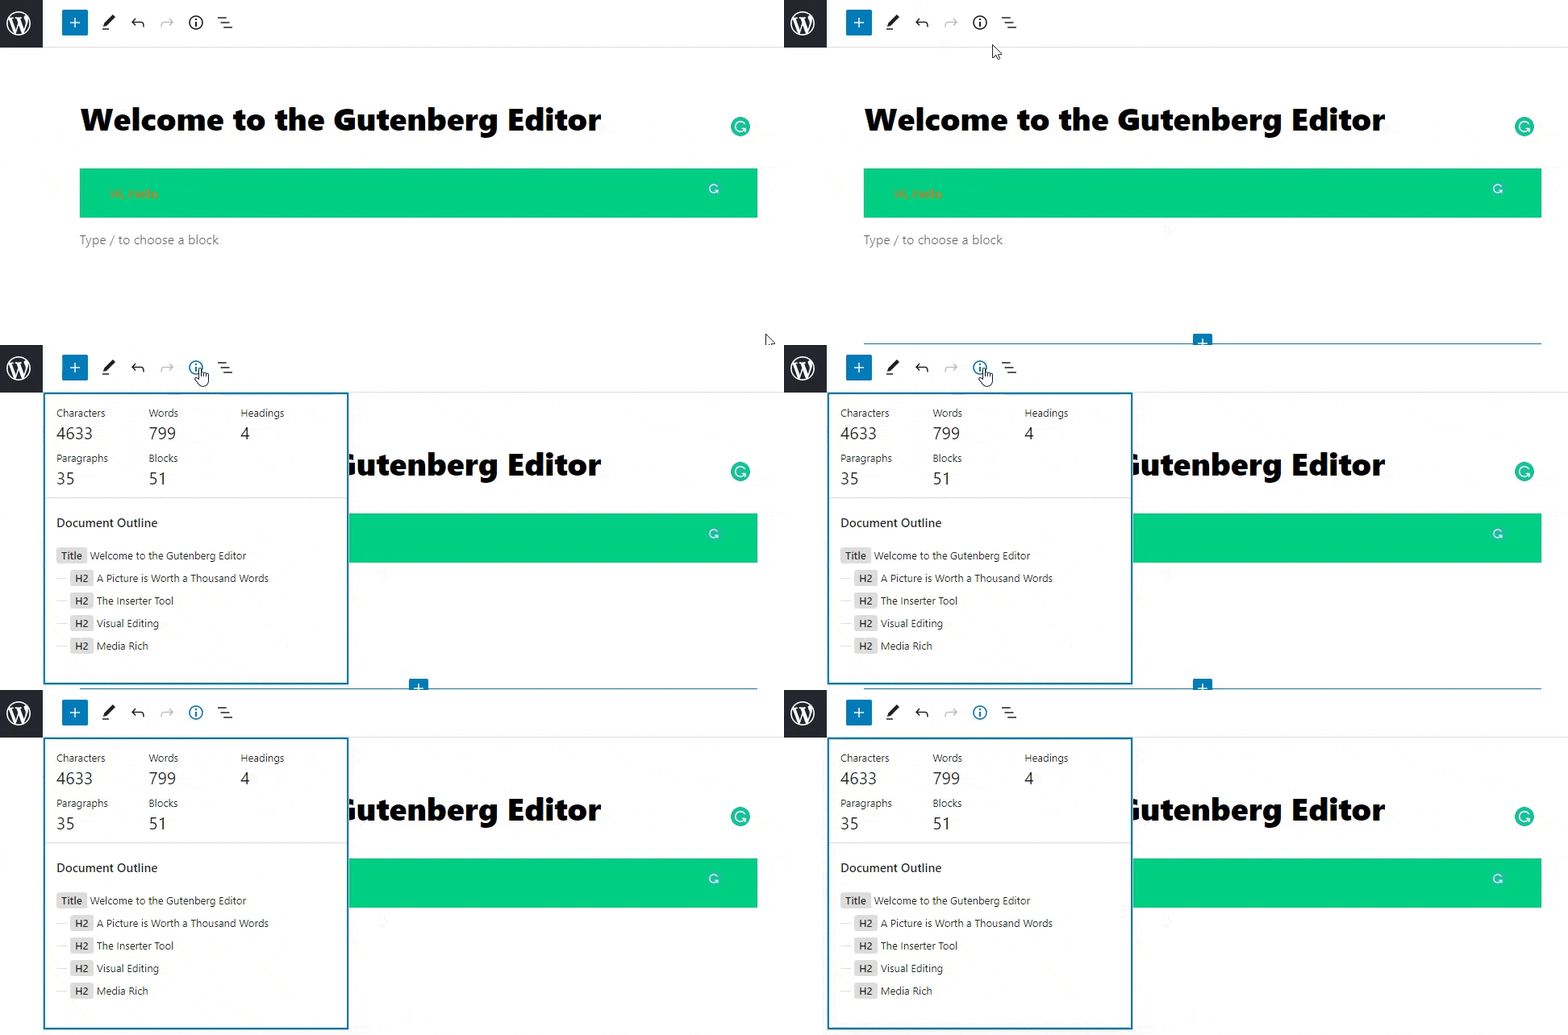
The entire block count, words, characters, and paragraph count will be calculated by selecting the information icon.
Reusable Blocks
The reusable block option makes the Gutenberg unique because most of the tools will not have this option. Here from the word, image, and everything can be reused until added to the reusable block repository.
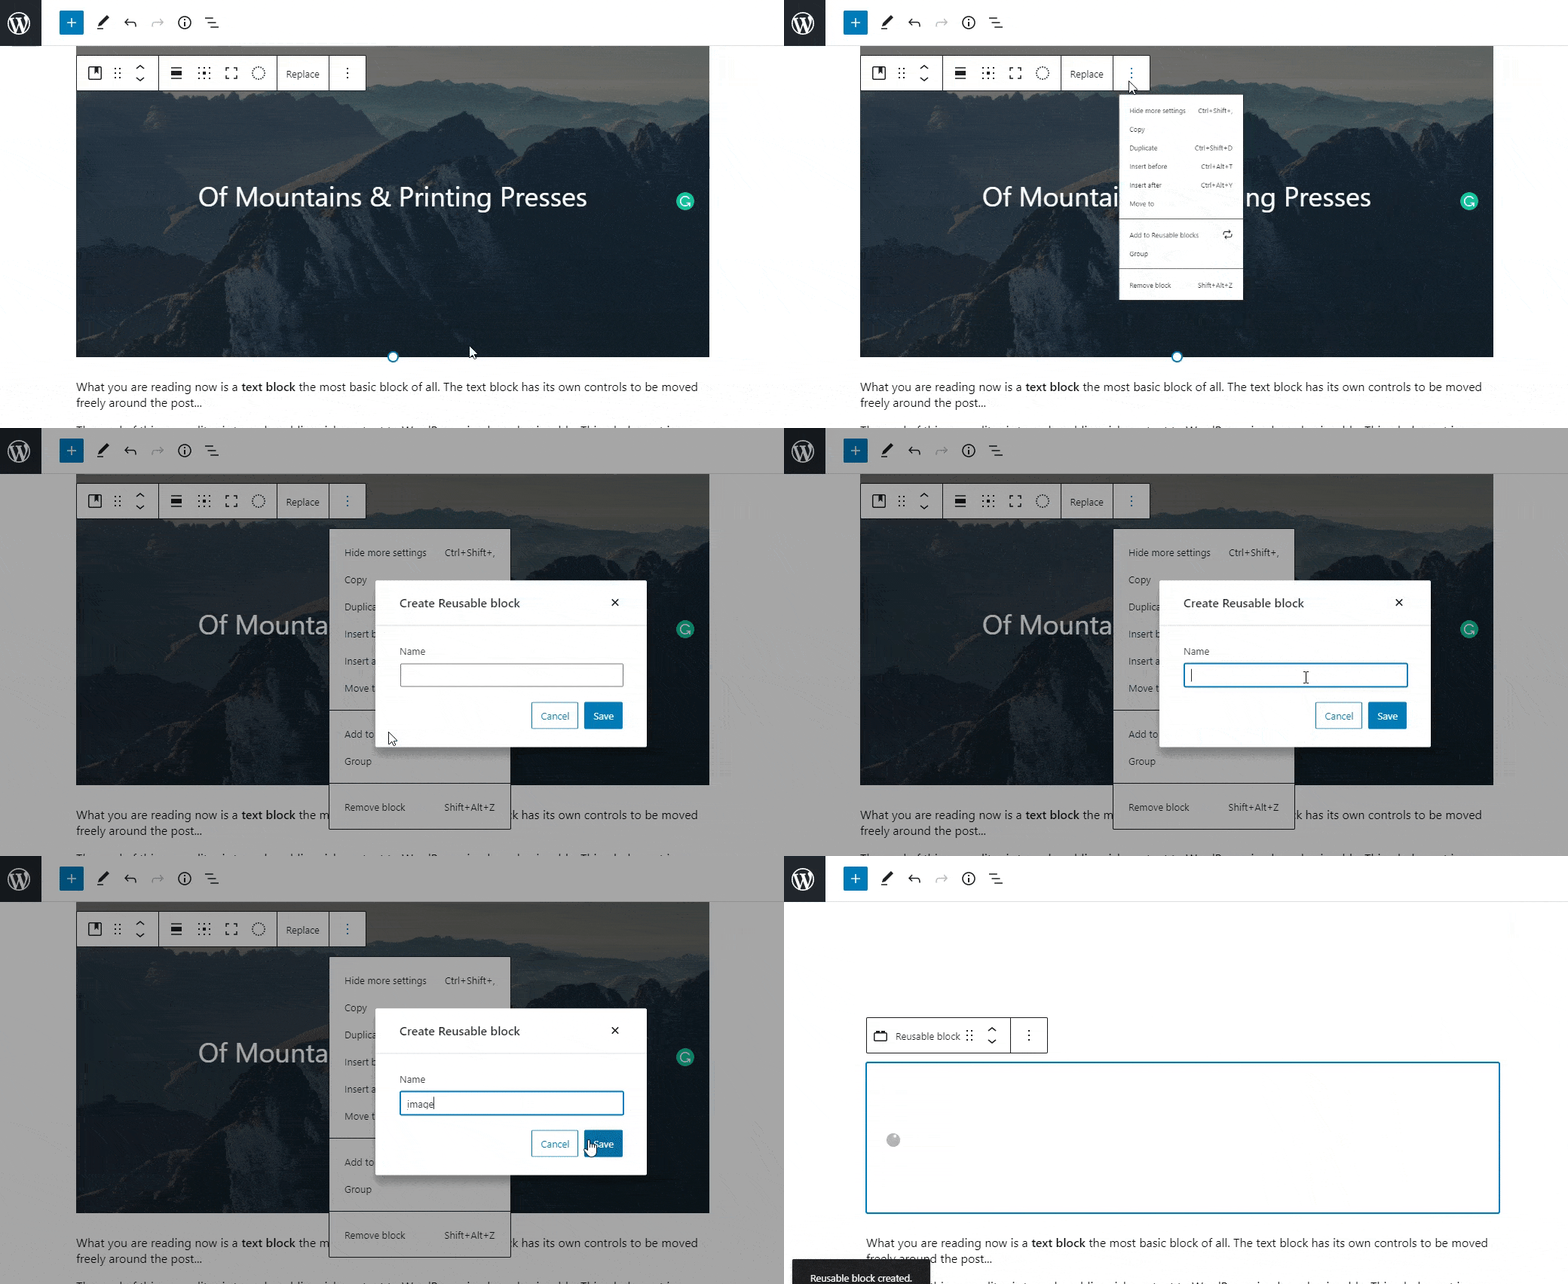
First, select the block that should be reusable and then select ‘Add to Reusable Blocks. Now, the block will be stored under the reusable repository.
Then if you think to add the reusable block in the future, do the following process.
Step 1: First, choose where you need to add the reusable block that can be of anything like image, text, embedded link, etc.
Step 2: Click the ‘+’ icon found left top corner and select the ‘Reusable’ tab.
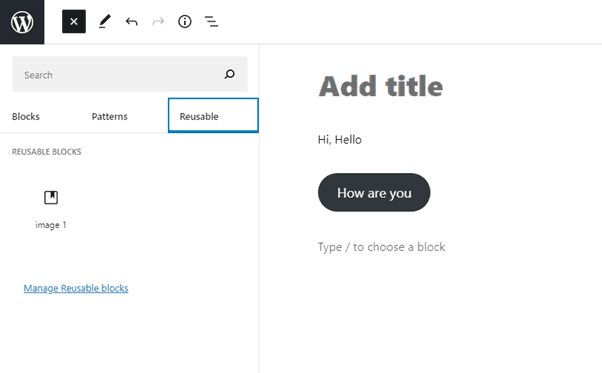
Step 3: Now, you can see the blocks added to the reusable block. By now, you can insert this reusable block anywhere for your wish.
Pros and cons of Gutenberg
Pros
- First of all, Gutenberg WordPress Editor encourages beginners to develop their own website from their first step.
- Allows embedding from many social media websites like Facebook, Twitter, Flickr, etc.
- Visualize all the contents as blocks and gives the way to organize those blocks easily.
- You can design a complex website using little knowledge because it doesn’t restrict users to apply HTML codes or shortcuts.
Cons
- Still, it is not ready for applying for live websites. – people are using live websites
- It holds some consistent bugs.
Summary
Gutenberg WordPress editor looks quite impressive by its own functionality because it gives more functionality while comparing it with others. Additionally, it has a repository to store the reusable blocks. However, most of the functionalities are available in the ‘Medium’ blog. I encourage everyone to use Gutenberg WordPress Editor to do with your entire website and blog works.
Hope you get an idea of the WordPress Gutenberg Tutorial. If you have any queries, please feel free to comment on us. You can subscribe to us on Facebook and Twitter.
