WordPress CMS provides you fantastic feature called plugins. The Plugins helps you to add or Extend new features on your WP site or blog. After installing WordPress, first, each beginner want to know is how to install WordPress plugin?. Here I will show you step by step tutorial for beginners.
How to install WordPress plugin?
WordPress is the famous content management system in the World. If you want to extend your site features then you need a plugin.
You can install the plugins only on self-hosted blogs. WordPress offers you three different ways to install the plugin on your blog or website.
- Search and Install
- Upload and Install
- FTP
Here I will show you how to install WordPress plugin by using step by step guide?
Install the Plugin using Search and Install Method
In this method, you can install the WordPress plugins easily compared to other two methods.
I will show you step by step procedure with screenshots.
If you know the plugin name you can easily install it on your website by searching through WordPress plugin dashboard.
You need to first login to your WordPress admin dashboard and click on Plugins -> Add New.
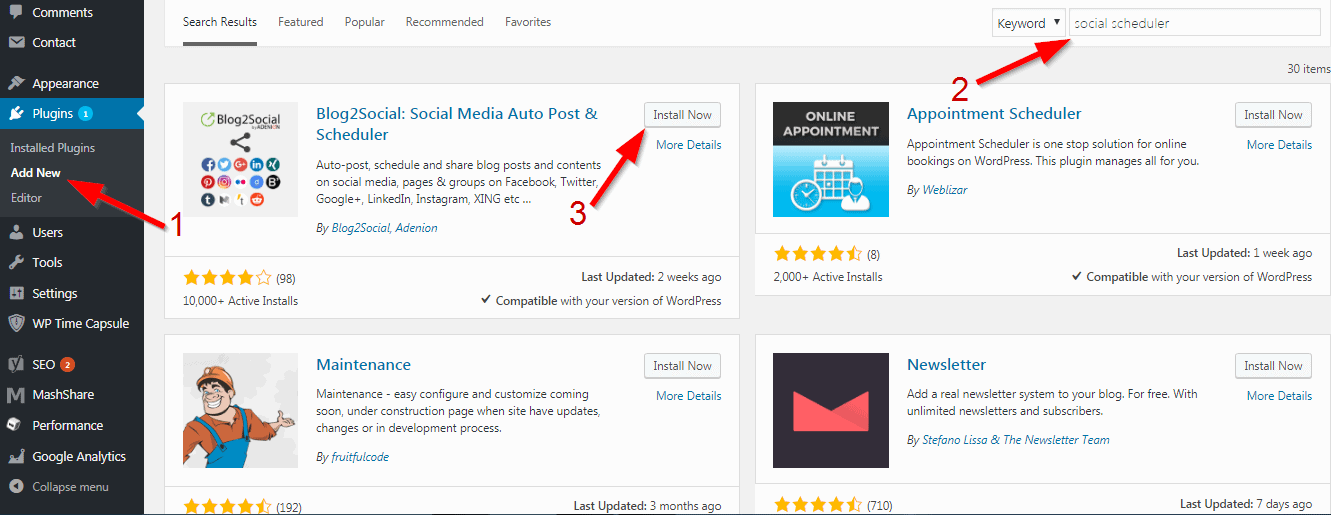
You will see the screen looks like above screenshot. And now you can type the plugin name or functionality you want to add on your site. In the above example, I’m typed the term “social scheduler” and which shows a bunch of results.
Before installing any of those plugins on your blog you must click to see more details about that plugin. And also make sure to check this version of the plugin is compatible with current WordPress version.
And also make sure to read the documentation of the plugin before installing it on your website.
After researching that plugin just click the “install” button and WordPress starts to download the plugin files on the folder WP-content/plugins. After installation clicks the “Activate” button.

You successfully installed and activated your first WordPress plugin.
Finally, after installing any plugin you first make sure to configure the plugin settings. I will not cover in this post because each plugin configuration settings vary from each other.
How to Install WordPress Plugins Downloaded From 3rd party sites?
Mostly third-party plugins are paid services and those plugins are not listed in WordPress free plugin directory. You can’t install this plugin using the first method.
You can install this plugin using upload and install method. I will show how to install these WordPress plugins using Upload method from WP admin area.
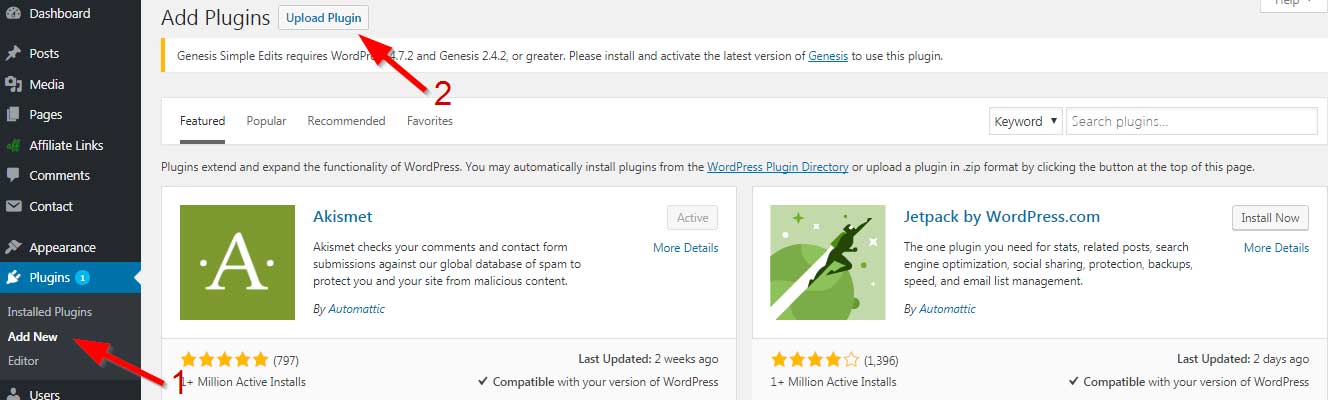
First, You need to download the plugin source file(zip file) from somewhere. Next step is Login to your admin dashboard and click on Plugins -> Add New.
After loading plugin page you can see the button called “Upload Plugin” on top of the page and Click that button.
Now you click on the “choose file” button and select the plugin zip file from your computer you already downloaded.
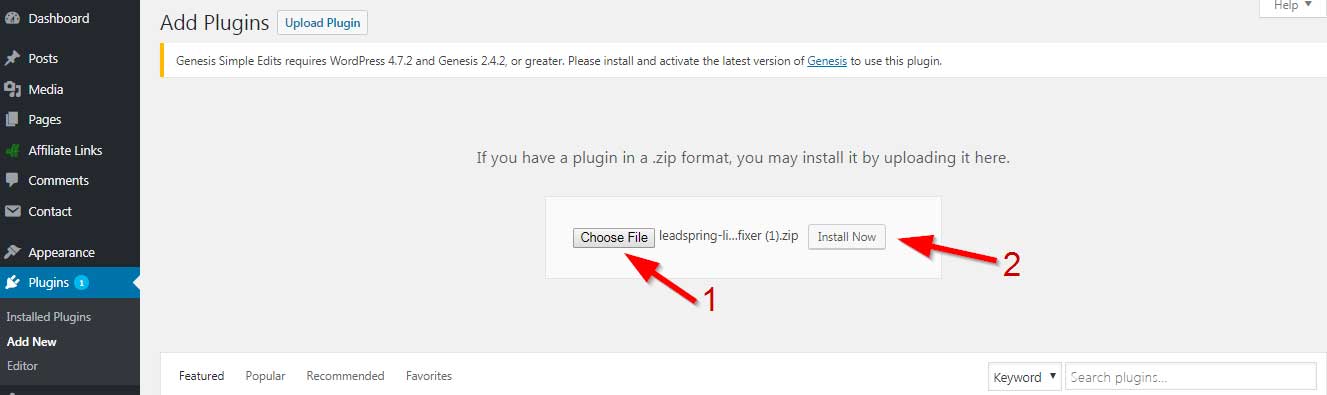
After choosing the plugin, you click on the “install now” button.
Now WordPress starts to upload plugins files into wp-content/plugin folder. After installation, you will see the success message like this.
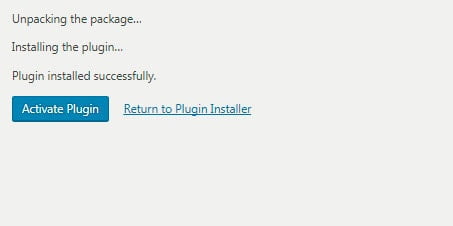
Now you need to click on “Activate” button to use this plugin on your site.
Install The Plugin Using Manual FTP Method
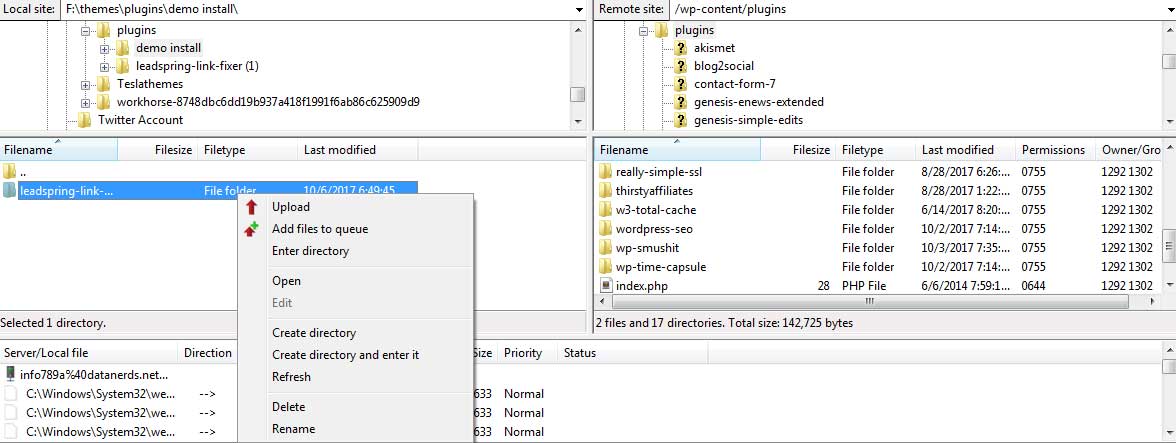
In this method, you can’t install the plugin using WordPress admin area. Instead, you can upload the plugin manually through FTP(File Transfer Protocol) client.
Before starting this process you should need a plugin source file, FTP username, and Password. You can manually create FTP credentials through hosting cPanel or ask your hosting provider they will help you.
You can download FileZilla FTP client software which helps you to connect your computer to a web host. Open the FileZilla software and enter FTP login credentials like host, Username, Password, and port. Finally, click the “QuickConnect” button you will be connected to your server.
Your computer successfully connected with your server, then you need to access the plugin path wp-content/plugins/ folder on your server.
Then you need to upload the extracted files into plugin folder path wp-content/plugins/.
Now your plugin files are uploaded successfully. After this, you need to activate them on WordPress admin area. Just click the admin menu “Plugins -> Installed Plugins“. You will see a list of plugins which are installed successfully.
You need to click the Activate link below the plugin name. After activation, you need to configure the plugin settings. Each plugin has a settings page which shows different configurations with each other.

I hope you enjoyed this post about How to Install the WordPress plugin? If you want to know more about plugins tutorials you could visit WPBlogX plugins category. I will write more articles about plugins.
If you like this post please like and follow on FaceBook and Twitter.
If you have any doubts please share them in the comment section. I will try to provide you the best solution.
Thanks man, I am sure this will help me a lot !
Hello,
After successfully installing and configuring the header and footer plugin, I was wondering how I can go back and change what appears in the header after I saved and exited the plugin? Can’t find a way to do this