
Everyone will be wondering what is child theme, how to use it and how this child theme configurator plugin is helpful to build a child theme. In this post, we will let you know how to configure child theme configurator for your WordPress website.
A WordPress child theme is that it includes all the features and attributes of a WordPress parent theme. It remains the same as a parent theme, but in the child theme, you can add your own functionality, change the CSS layout, modify PHP templates etc. By editing the theme, it may look as you expected.
But without a child theme, if you edit all these, and if the main theme version is updated all your changes will be lost. In order to avoid that situation, you can create a child theme and make your changes, so that even if the parent theme is edited, all your changes remain same in the child theme.
Child theme for your WordPress website can be created manually as well as by using plugins. In our existing post, you can see how to create a child theme manually?
But creating child theme manually takes a lot of time and you have to do it carefully. But whereas when you go about creating the child theme using a plugin, it’s a quite easy task and saves a lot of time. There are many child theme plugins available, but the most common one is Child theme configurator.
Installing and configuring this child theme plugin is not a difficult task. You can easily configure with just a few clicks. In this post, we will see the child theme configurator tutorial.
How to Install and SetUp Child Theme Configurator?
Child theme configurator plugin is the most popular and easy way to create any child theme. It is a free plugin with more than 80000+ installs. There are many plugins available to create a child theme.
But one of the best plugin considered so far is child theme configurator. This plugin is easy to modify template files and customize CSS. Instead of using the @import in the style.css file, this plugin uses the enqueue method to bring the stylesheets in the functions.php files.
With the help of this plugin, you can automatically create the child theme with just a single click. This plugin will show you the changes and customization you made before you commit to the child theme. With one parent theme, you can create any number of the child theme. The below shows the installation and configuration of child theme configurator.
Installation of child theme configurator:
To install this plugin
You have to log in to your WordPress dashboard
Then move to plugins>add new
Then type child theme configurator in the search box
Once found, click the install button and activate the child theme
Configuring Child Theme Configurator
Once you activate the plugin, now go to dashboard>tools>child theme. By clicking the child theme you fill tabs such as Parent/Child, Query/Selector, Property/Value, Web fonts, Baseline styles, child styles, Files, and Upgrade. You have to configure each tab, in order that the child theme configurator works effectively.
1.Parent/Child Tab
Under the parent/child tab, you have enabled the following options:
Select an action
CREATE a new child theme→ You have to enable this option by default. By enabling this option a new customized child theme is created by using the installed parent theme.
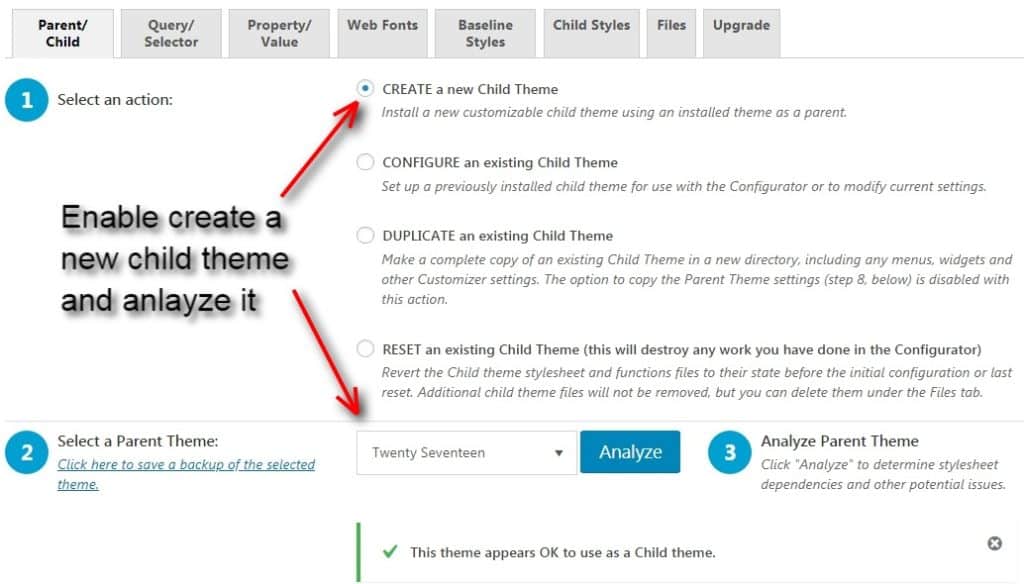
CONFIGURE an existing child theme→ You can also enable this option if you want the existing child theme in use.
DUPLICATE an existing child theme→ With this option, you can make a copy of your existing child theme in a new directory, including the widgets, customizer settings, any menus etc. But if you enable this option, you won’t be able to able to copy the parent theme settings.
RESET an existing theme→ By enabling this option, your entire changes done with configurator will get erased. In case if you want this option to enable, you have to revert the child theme settings to their original state.
Next, you have to Select a parent theme→ Here you have to select a parent theme which you require in the drop-down menu.
Once selecting it, you have an option Analyze, click on the analyze button check the stylesheet dependencies and other potential issues. If no problem occurs, you will receive a message ‘This theme appears OK to use as a child theme’.
Next, you have an option Name the new theme directory→ This option will directly display the child theme’s directory name. The name will be the same as parent theme name, appending a ‘-child’. If you wish to change the directory name you can change it or else leave as it is. To be noted is, it is your directory name and not your child theme name.
The next option is Select where to save new styles→ This plugin gives you two options like when your stylesheet of the child theme to be saved. One is primary stylesheet(style.css) and another one is separate stylesheet. You can choose the primary stylesheet if you don’t have any existing child theme. So that this option will create a new style.css file in your child theme directory. If at all if you have an existing child theme, then this plugin will replace the old style.css with the new style.css. Then if you don’t want to overwrite your existing child theme style with your new style, you can choose the separate stylesheet option.
Another option is Select parent theme stylesheet handing→ Under this you have options such as use the WordPress style queue, use @import in the child theme stylesheet, Do not add any parent stylesheet handling and ignore parent theme stylesheets. In this, you just have to enable the option ‘use the WordPress style queue’. This option lets you use the functions.php file of your child theme to enqueue parent theme style to the child theme. The next option @import is not recommended. The next option ‘do not add any parent stylesheet handling’ can be enabled if you don’t want to use parent style theme. The last option is usually not recommended and if any case you use child theme framework like Genesis or use child theme styles only for the appearance you can enable this method.
The next option is Customize the child theme name, description, author, version etc→ By clicking the tab Show/hide child theme attributes you will find child theme name, theme website, author, author website, theme description, theme tags and version. If you wish to change the child theme name, you can change it here. This name will appear in the appearance> theme, once you activate it.
Next is Copy menus, widgets, customizer settings, from the parent theme to the child theme→ One of the notified problem while creating child theme manually is all the menus, widgets, background, settings will be lost. But this plugin allows you to copy all the items from the parent theme. You just have to click the option.
The last option under parent/ child theme is Click to run the configurator→ In this option you have click on ‘Create new child theme’. Once clicked you can see a message ‘Thank you for installing child theme configurator’.
2. Query/Selector Tab
This option is used to find the specific selectors and edit them. You can select the specific selector which you want to change. In the @media query, usually select base. Then in the selector, you can choose what to be changed.
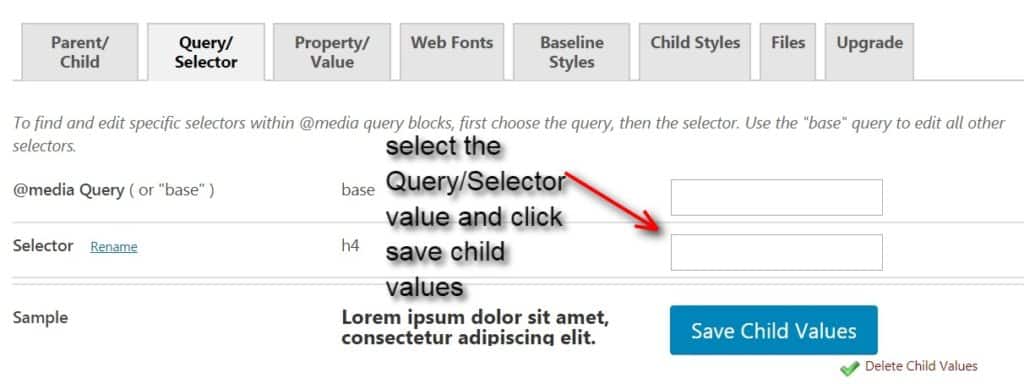
For example, if you select h4 in the selector, the desired parent theme styles will display, you can make fill the required fields to make changes in your child style theme. If you wish to add new CSS selectors or even a new @media, you enter the CSS in the ‘Raw CSS’ by clicking the copy selector.

Here in the given box, you can add your new styles, but be sure the syntax must be correct. Once done you can click save option. You can see the changes by clicking the ‘live preview’ button in the theme manager.
3. Property/Value tab
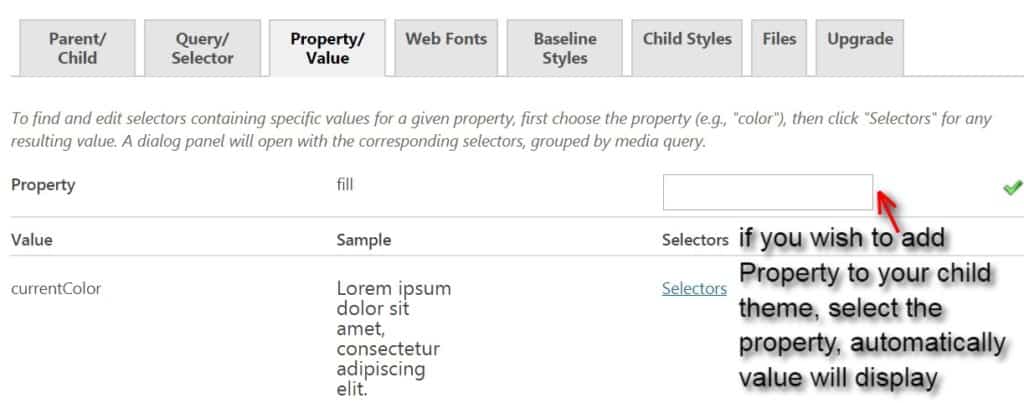
Additional if you wish to add a property to the CSS selector, initially you have to load the Query/selector tab. There you have to find the property which you wish to override by entering in the ‘New property autoselect’ box.
Once entered click the ‘Enter’ tab. Now a new input row is added to the selector inputs. This option is mainly used to find a specific value for a given property. Then the unique value will automatically load in the property box.
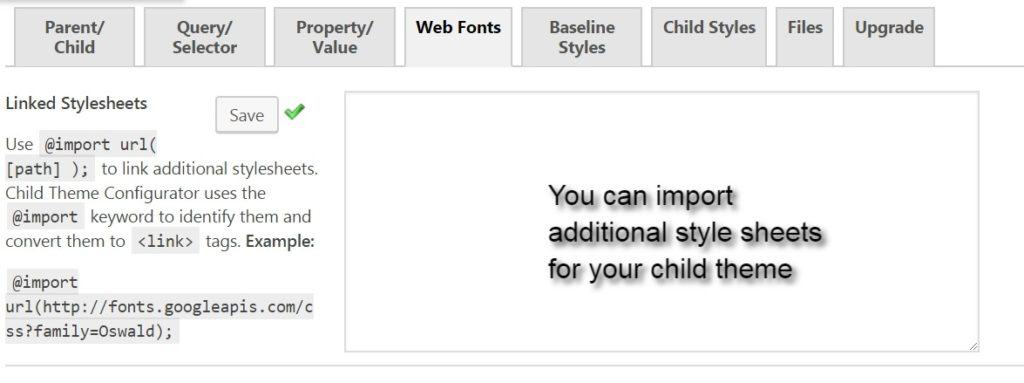
4. Web fonts
With this tab, you can import additional styles and fonts that to be used in your child theme. You cannot import these styles and fonts in the parent theme. If you want to add to parent theme then click ‘Parent stylesheet handling’ under the Parent/child tab.
5 & 6. Baseline styles & Child styles:
The baseline styles tab displays the parent theme style.css and the child style tab displays the child theme style.css files.
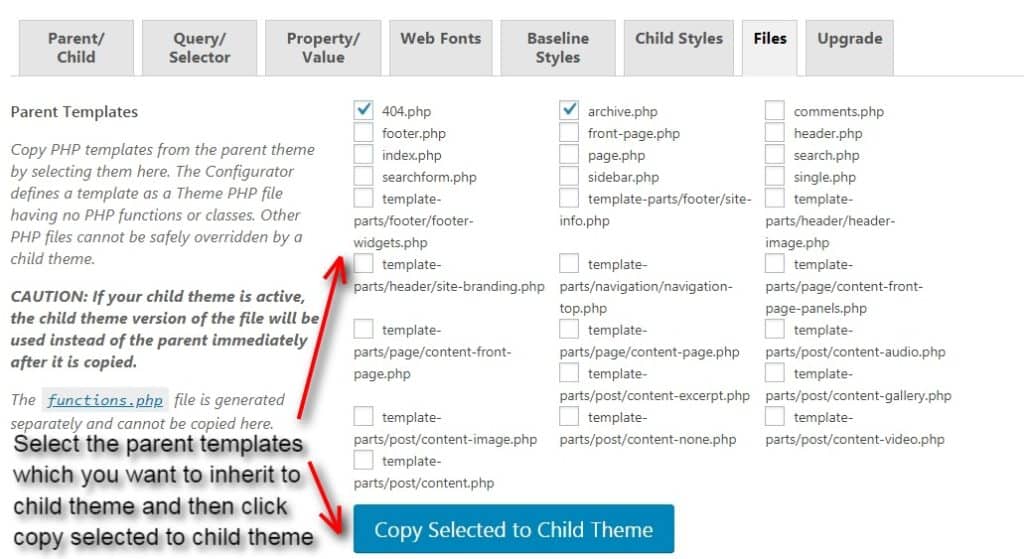
7. Files
Parent Templates:
This tab allows the parent theme files to copy into the child theme. Here you can select the parent templates which you want to inherit for your child theme. By default function.php file will be in the child theme files rest whichever template you want to inherit you can click on the icon.
Child theme files:
Here all the copied parent template will display. These templates can be edited by clicking the link ‘Click to edit a file using the theme editor’. Once done remove the child theme images by clicking the box and press ‘Delete selected’ button.

Upload new child theme image:
All the theme images will be under the image directory in the child theme and these images can be used only for the stylesheets. You can choose a file from the media gallery and then click on the ‘Upload’ button.
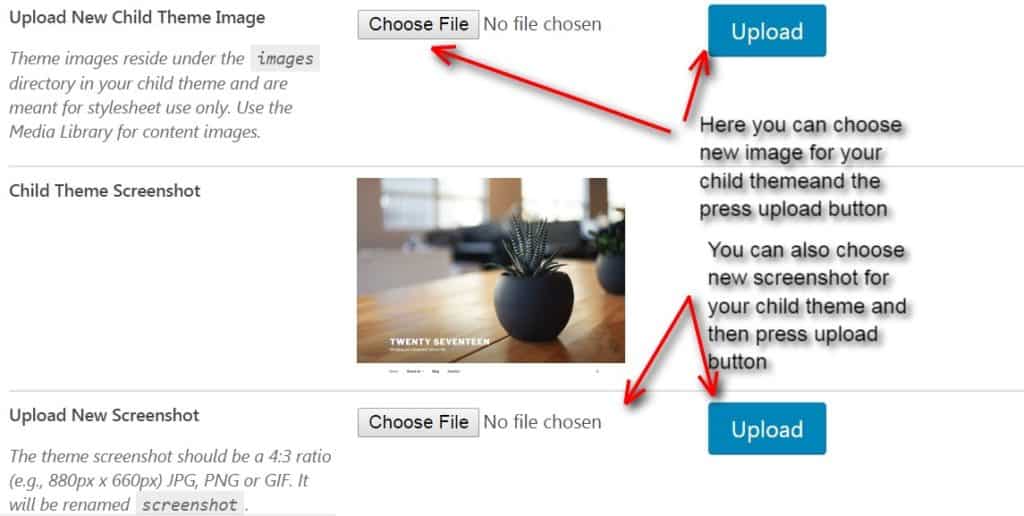
Child theme screenshot:
Under this, you can upload the new screenshot for your child theme. The theme screenshot size should be 4:3 and it should be in JPG, PNG or GIF.
Export child theme as ZIP archive:
Here there is a button ‘Export child theme’. By clicking the button you can export your child theme to another WordPress website.

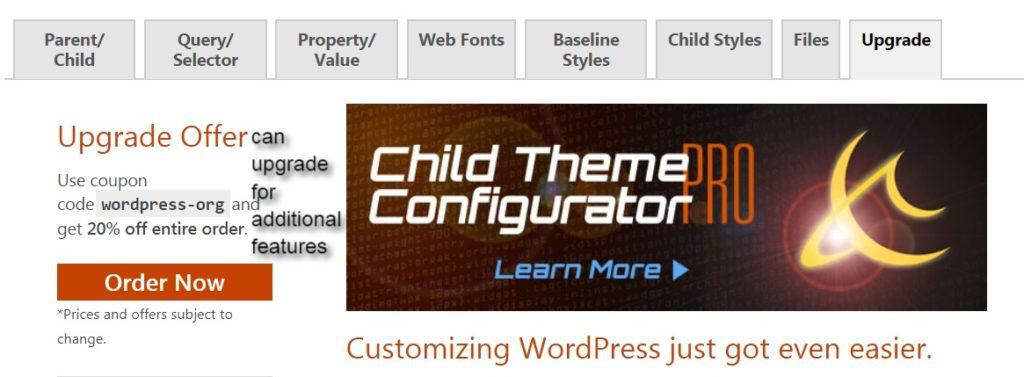
8. Upgrade
This tab gives you the child theme configurator pro version. If you want to purchase pro version, you can click on the order now link with certain discounts.
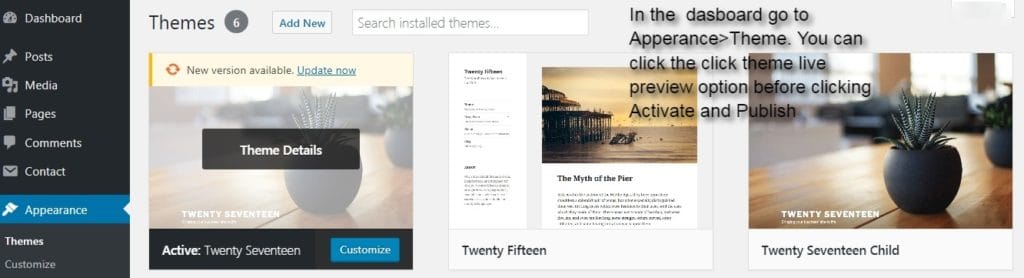
The important thing to be noted is, you have to test the child theme before you activate it. In some cases, the themes don’t load the parent theme files correctly or it won’t automatically load the child theme styles. So what happens is, your website may get crashed if you active the child theme.
So first move to Appearance> theme in the dashboard. There you will an option called new child theme. There click on ‘live preview’ and check how it works. Once it is done, you can click the ‘Activate’ button. Now your child theme works effectively.
Final thoughts
A child theme is mainly including all the features and attributes of a parent theme in order to customize your theme. To do this, child theme configurator plugin plays an important role. It is considered as the best child theme creator plugin. Hope you liked this article about child theme configurator tutorial. If you have any queries please feel free to comment us. You can subscribe us on Facebook and Twitter.
This article is really good. child theme configurator is the best plugin for creating the child theme. You made me understand the concept and setup very easily. Thank you so much.
I have totally messed up a website trying to install a child theme. This is a fantastic walk-through and tutorial and now that I feel better armed with your walk-through, I feel much more comfortable giving it another shot.
Outstanding!
Thank you
Some of the instructions are a little vague and could be more descriptive. There are so many new features being added to WordPress sites. I “thought” there was a video somewhere, but I can’t find it.
My parent theme has a regular stylesheet (style.css) in the parent theme directory, just like they’ve been forever, but then it also has bootstrap. Many of the responsive features don’t seem to be working correctly, and I don’t know if I’ve set it up right. I’ve had other themes with bootstrap and had theme authors tell me my child theme was not configured correctly when my site crashed after an update. So while it seems handy…I’m not really 100% sold on it.
I love Child Theme Configurator. It was a huge time saver for people that don’t want to mess around creating a child theme although it’s important to understand how it works from the ground up. This plugin provides a great range of functionality including configuring CSS, Tags, Selectors etc although I still prefer my handy text editor. I just want to say great article and very informative. I do wish you made this full page width and expanded on the detail a bit. But none the less great job!