
Are you searching for a solution to create a quiz in WordPress? Confused about the right solution, then this article will clear your doubts.
You will come across many solutions, but in my opinion, using a plugin is the best option.
So which plugin is best for creating quizzes in WordPress? Below you will find the solution.
Quiz and Survey Master is the best choice to create a new quiz for your website in WordPress. The reason is that it has many features that others do not have.
So follow me and I will show you how to create a quiz with the plugin “Quiz and Survey Master“. Because there are only six steps to create a quiz.
Step 1: Add a new quiz

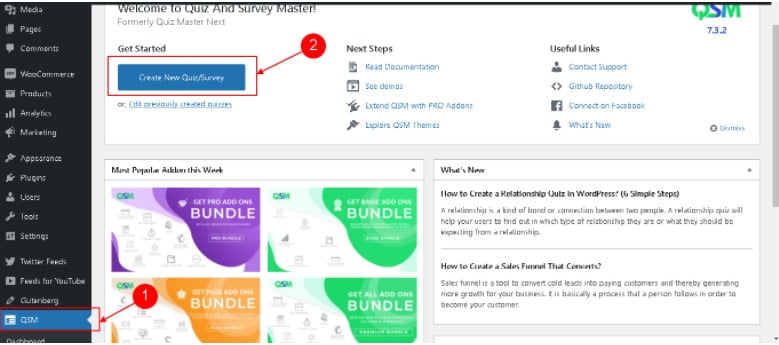
First, install the plugin, which you can find in your WordPress plugin store. Simply install and activate it. Once activated, the plugin will appear in your dashboard under the name “QSM”.
Next, simply go to the plugin’s dashboard and start creating your quiz from there. The dashboard contains everything you need to create a quiz for your participants.
The dashboard guides you in creating a new quiz. It also contains links to demos, documentation, themes, and addon options.
To create a new quiz, click the “Create New Quiz/Survey” button in the dashboard. You can edit an existing quiz by clicking the “Edit previously created quizzes” link in the dashboard.
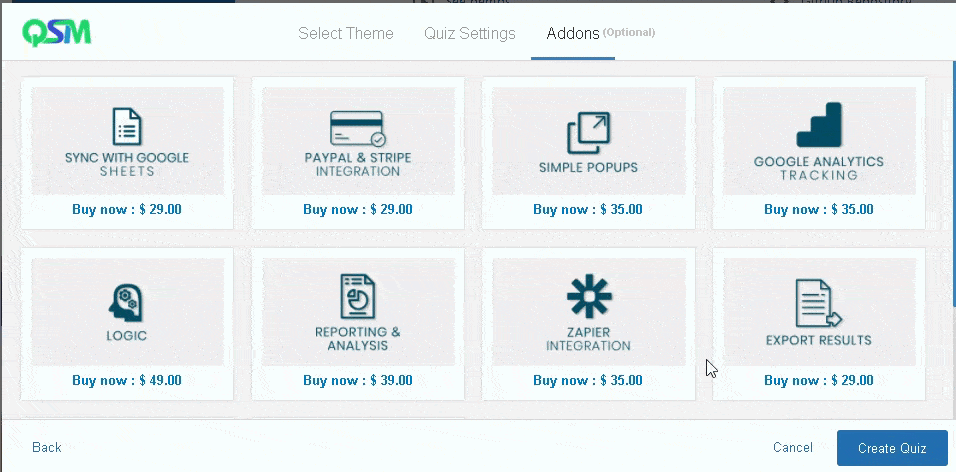
Once you click the create new quiz button, a pop-up window will appear where you can select a theme for your quiz, quiz settings, and add-ons (optional).
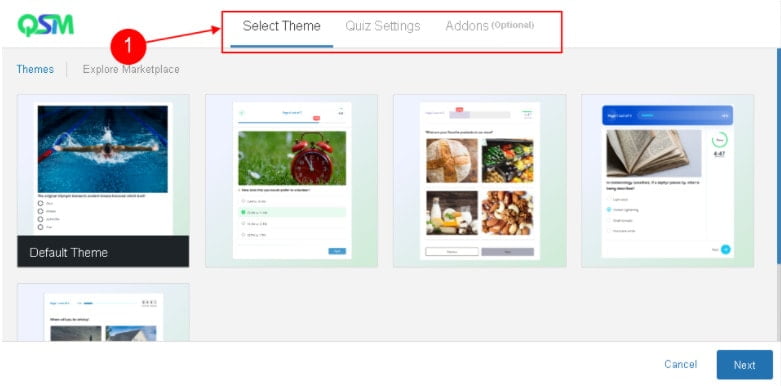
With the free version, you can only use the default theme, with the premium version you can use everything. Now select the theme for your quiz and go to the quiz settings.
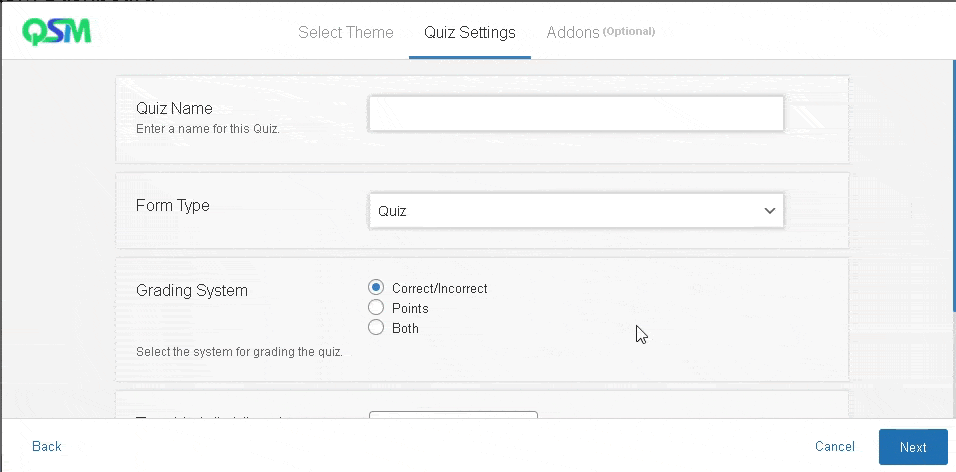
Give your quiz a name, name the grading system, a time limit and choose if the user has to log in to access the quiz.
If you need addons, you can use them, but you will need to purchase them.
Step 2: Questions
Once the quiz is created, you will get a new screen where you should first enter the questions for the quiz.
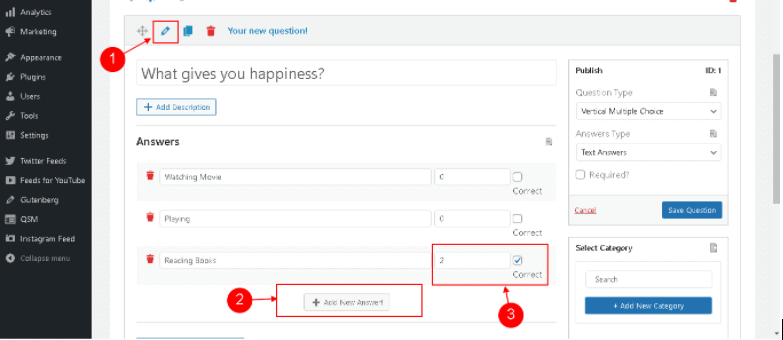
To create a question, you should enter a question along with the answers to the question. Then indicate which answer is correct and award points for the answer.
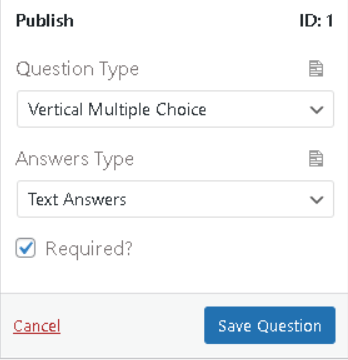
Before creating a question first, select the question type and answer type and indicate whether the answer to the question is required or not.
Question type:
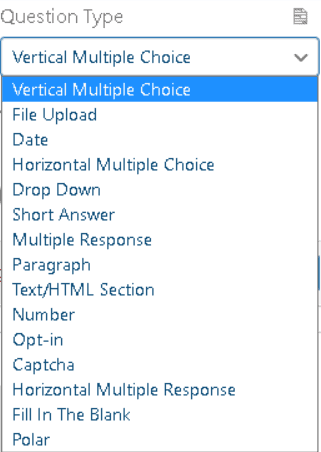
These are the question type can be used in your quiz creation.
Answer Type:
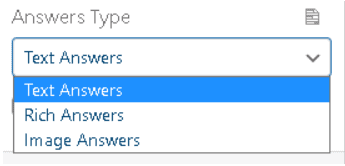
These are the answer types available to participants when answering their questions.
Step 3: Message for Quiz
You can enter a message before or at the end of the quiz or results page, etc. In this section, you can enter a message for the quiz. First, select where you want the message to appear and enter the message in the text box.
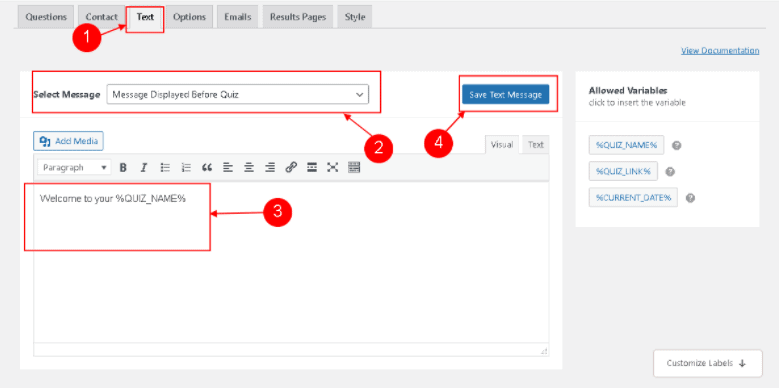
The following are the options to display the message in the quiz.

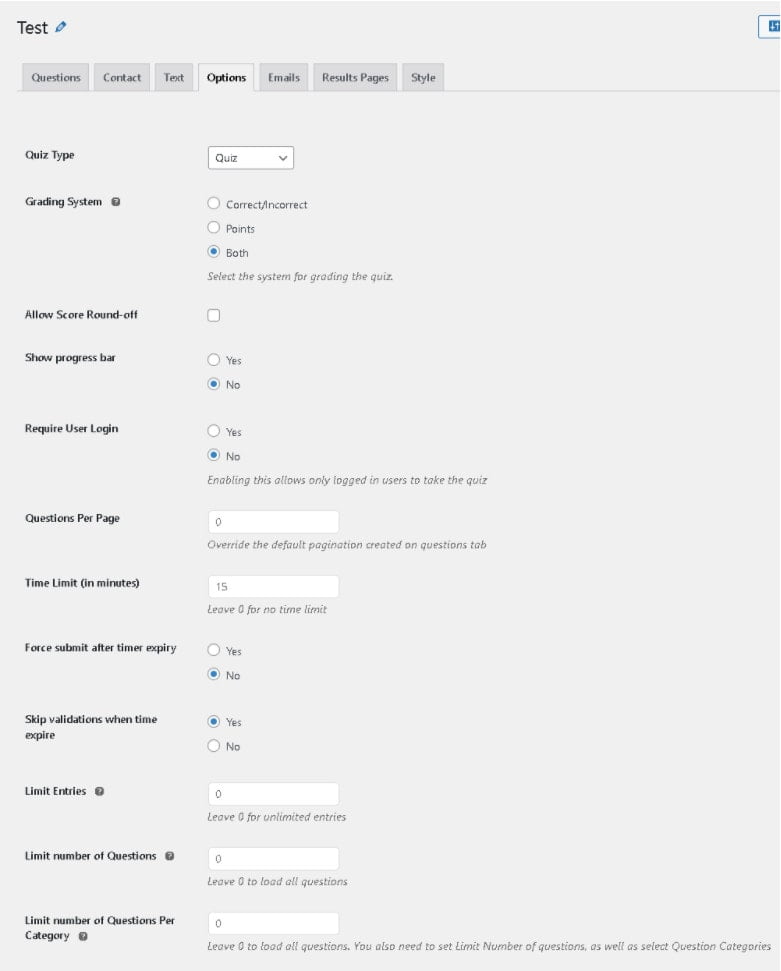
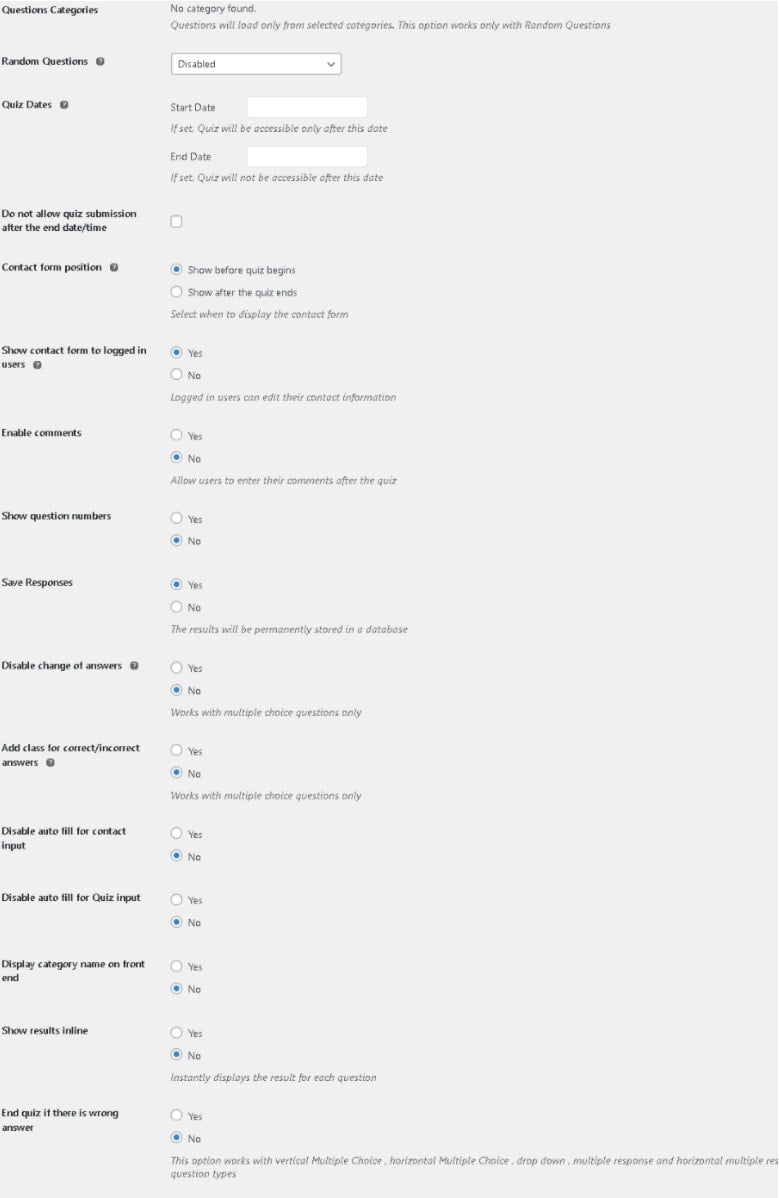
Step 4: Quiz Options
The plugin provides several options for managing the quiz. Here you have options like start date, end date, specifying limits for attempts, entries, questions, grading system, etc. It is easy to understand and adapt to your quiz.
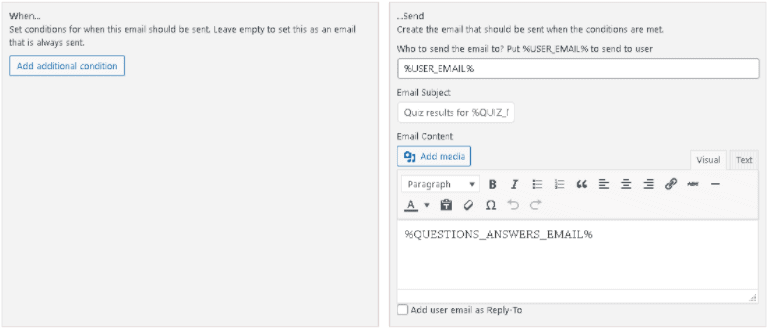
Step 5: Email Option
With this plugin, the administrator can send the invitations for the participants in the quiz. The plugin allows you to specify the conditions for sending and composing the email.
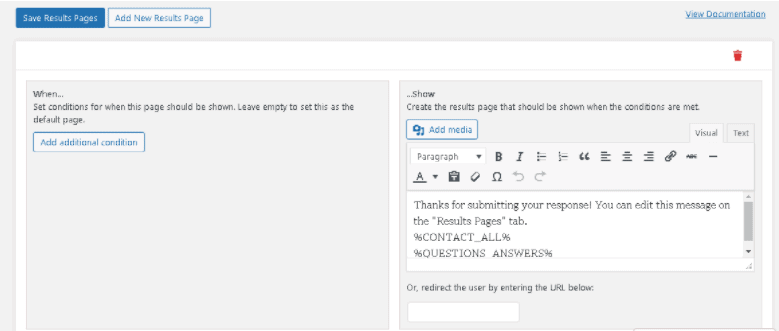
Step 6: The result page
The plugin also allows specifying the message to be displayed after the quiz is completed. The message will be displayed to the user who attempted the quiz.
So, these are the options of the plugin to create a quiz for your participants.
Summary
I hope you have understood how to create a new quiz using the “Quiz and Survey Master” plugin. This plugin will be of great use to you in creating and managing a plugin. It gives you more options to manage the quiz. So I recommend you to use “Quiz and Survey Master” for your quiz.
Hope you like our post, How to Easily Create a Quiz in WordPress. You can follow us on Facebook and Twitter to get the latest updates.
Prabhu Ganesan provides his web development and WordPress services independently. He is the founder of WPBlogX. He is very much involved in WordPress as it becomes second nature for him. You can get in touch with him by visiting his website – WPBlogX.com and you can also find him on Twitter @gprabhucbe.