WAMP stands for Windows, Apache, MySQL, and PHP. WAMP is actually used for the web development to test the website locally(in your computer). The WAMP provides developer basically four key elements such as an operating system, database, web server, and web scripting language.
The combined package is called a server stack. In this package, the operating system is the Microsoft Windows, web server is Apache, the database is MySQL, and the scripting language can be PHP.
Apache is a web server that runs in Windows. By running this web server on Windows, the developer will be able to test their web pages in a browser without publishing it to the outside world. MySQL is a high-speed database that helps to store all the website content, comments etc.
PHP is a server-side scripting language designed for dynamic Web development. This programming language process the Apache server and communicates with MySQL to create a webpage. With the help of MySQL and PHP, the developer can create dynamic websites and customize it however they require before making it live.
Keep in mind that WAMP is just to develop and test your WordPress or PHP website locally. If you want to make it live, you have to purchase a domain name and web server. WAMP is one of the local server easy to install and use.
Steps to Install WAMP Server
Step 1: Download the WAMP server from the official website. You will find two versions like 32 bit and 64 bit. Based on your local machine, download the version.
Step 2: Once you choose the version, download and install the server in your local machine in a computer drive. As soon as you install the WAMP, open the WAMP icon in the desktop, and check if the services in WAMP are running or not. Navigate to the taskbar, and check if the WAMP icon is in green color.
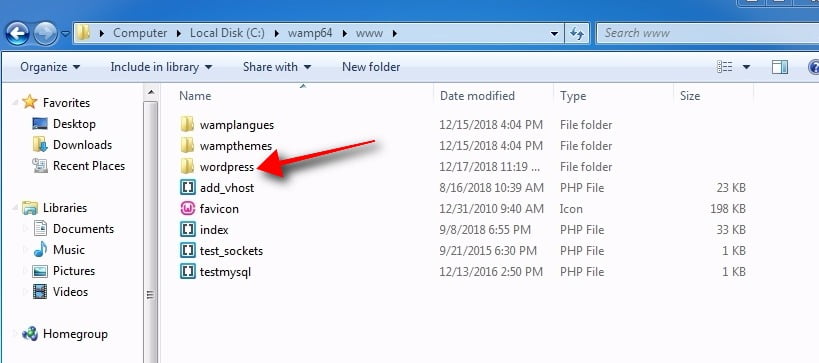
Step 3: Next download the latest version of WordPress from the official website. This software will come in the zip file with the name WordPress folder. You have to extract this files into your C drive > wamp64 > www.
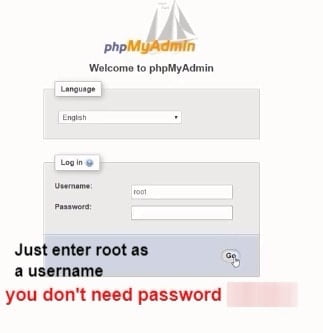
Step 4: Next step is to create the database for your website. To create a database click on the phpMyAdmin option from the icon, or directly navigate to localhost/phpmyadmin on your web browser.
Step 5: Creating a database is very easy, just click on the ‘New’ menu available on the left side of the navigation menu. In the text area enter your database name and click ‘Create’ button. You will be asked to create tables, but don’t create any tables WordPress will automatically create tables for you.
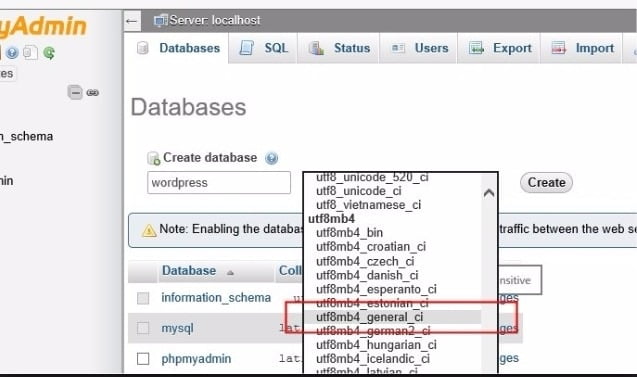
Step 6: Once the database is created, all the WAMP services are running. Now you have to initialize WordPress. Before that Create a username and password for your database. Please refer the below image
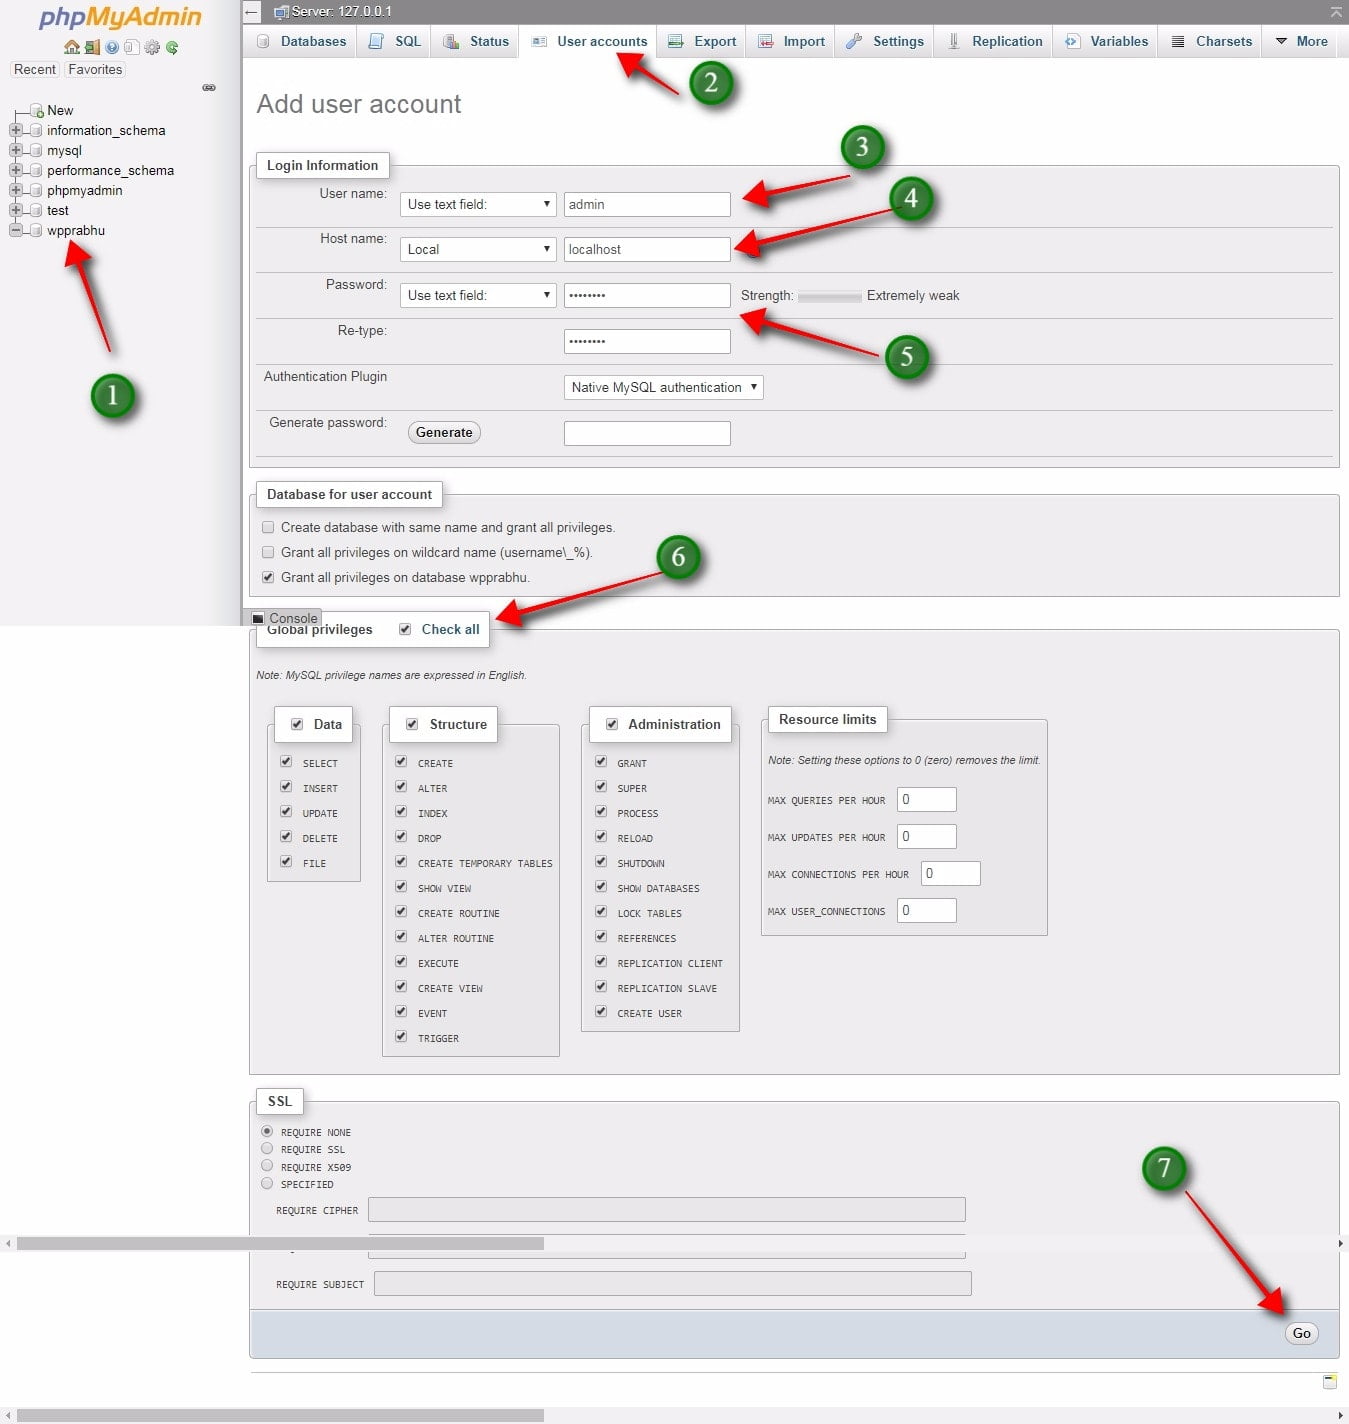
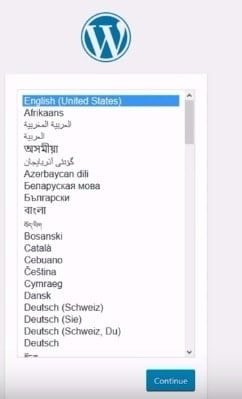
Step 7: Next open your web browser and type localhost/WordPress, now you will be asked to select a language for your WordPress proceeding with another page with the ‘Let’s Go’ button. Click on to that button.
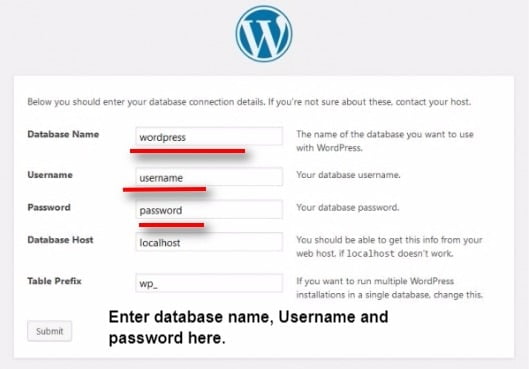
Step 8: In the next step you have to enter the database name which is already created by you. In that page enter the Database name, username, and password.
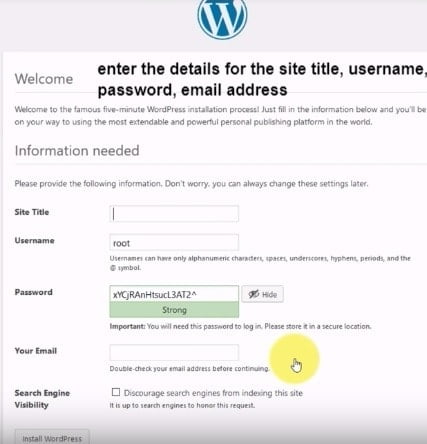
Step 9: Then in the next page enter the details for the site title, username, password, email address. These credentials are important.
Step 10: That’s it, you will redirect to another page with a success message provided with your username and password. In that page, you will see a ‘login’ button to enter into your WordPress admin dashboard.
Step 11: You can use this button to enter into your dashboard, or you can enter localhost/wordpress/wp-admin.php in your web browser. Typing your username and password, it will redirect to your admin panel.
That’s great! You have successfully installed WordPress in your local server. Now you can start creating your website, by installing the necessary theme and plugins.
Conclusion
No matter whatever purpose you’re creating a website, it is always safe and secure to set up a localhost server. It saves a lot of your time and you can work even in offline which saves your money as well. Nothing to get confused, install a localhost server and start working.
You may also like this articles
- Difference between WAMP and XAMPP and Which One is Better?
- What is XAMPP?
- How to install WordPress on XAMPP?
Hope you got an idea about what is WAMP and how to install it. If you have any queries or suggestions, please feel free to comment to us. You can subscribe to us at Facebook and Twitter.
